Norfolk Street Cruisers .
Club Cars , Lionel
If I manage to get time and remember to take photos I will endeavor to keep a log of the work on the Model 'A'
25.04.14
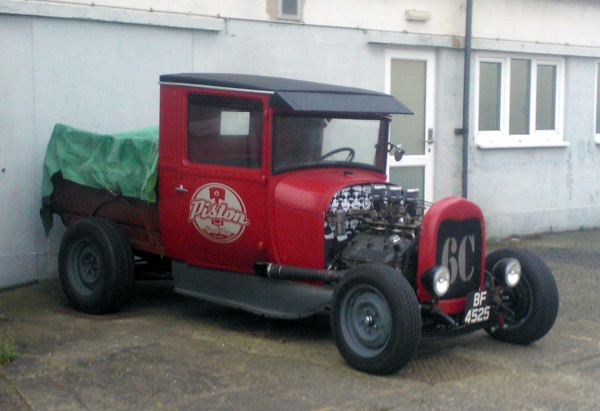
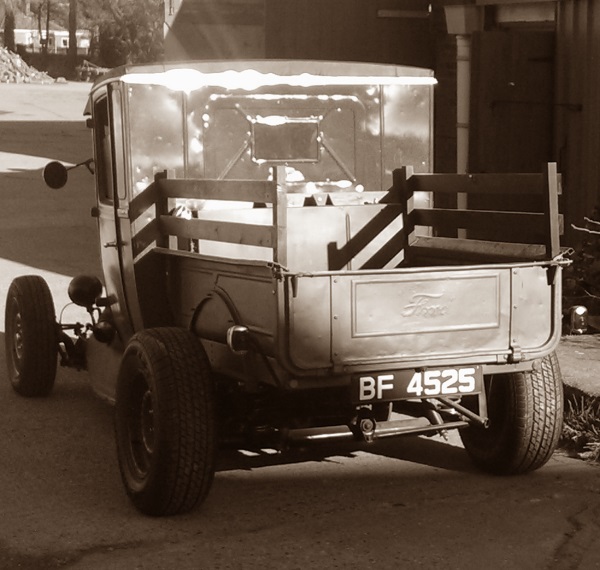
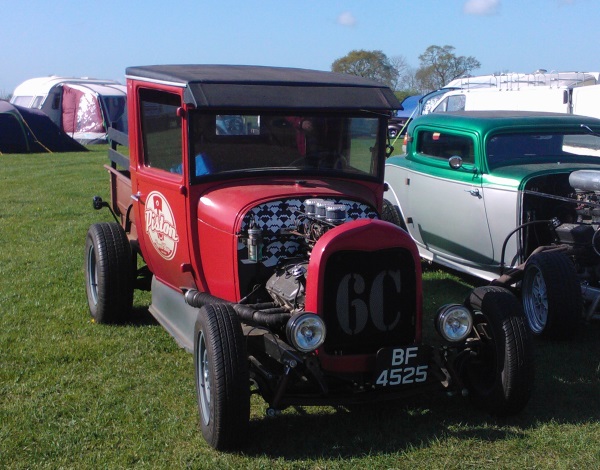
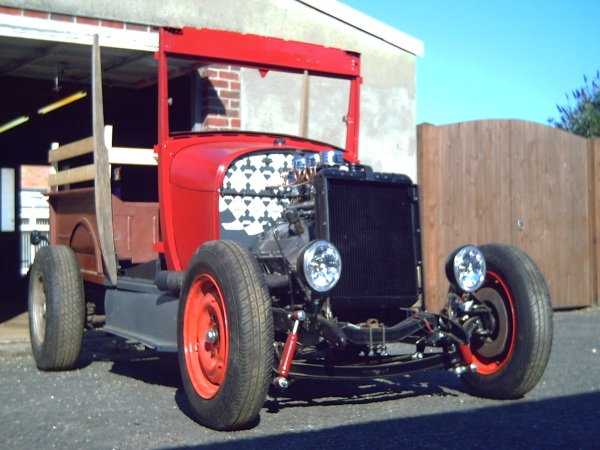
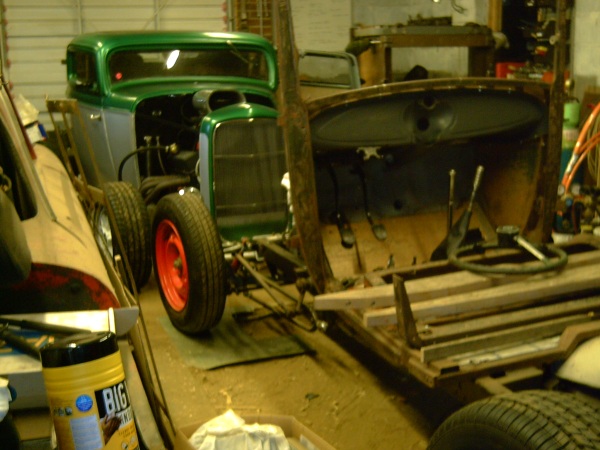
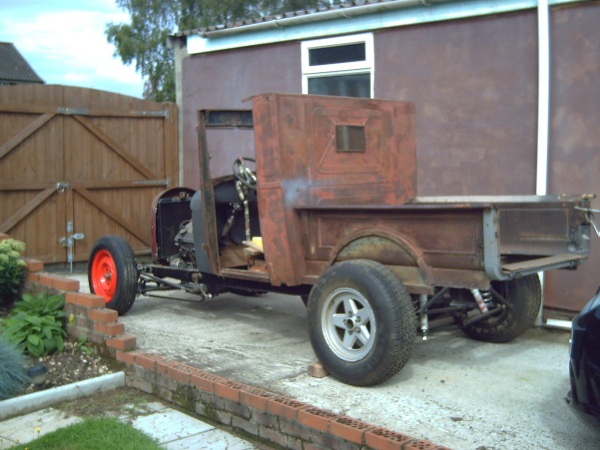
I can't beleive that it's been so long since I last updated this page, Since my last post the truck has attended two shows under it's own steam, the nfirst was to 'Spring Break' at Sonham a 78mile round trim, I managed 76 and finished the last two on string, In Keiths words "I could not have licked the fuel tank cleaner" note to self more fuel next time. Next time was the Easter Bonnet run which went without a hitch, as with all builds there are things I would do differently and change after the shake down runs, Exhaust needs to be re-maid in Stainless as the wrap is causing rapid corrosion on the current one.
|
|
|
|
09.02.13
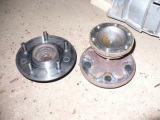
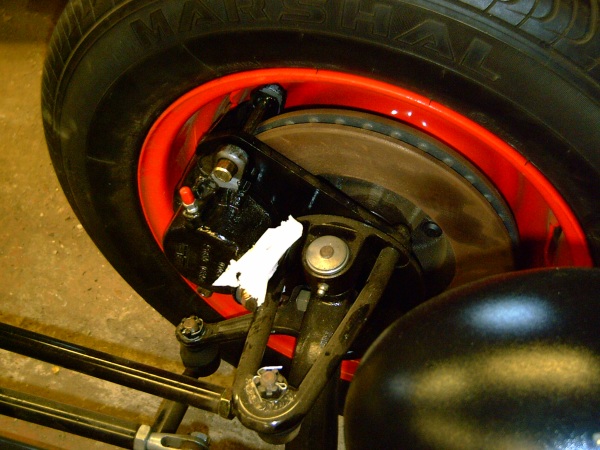
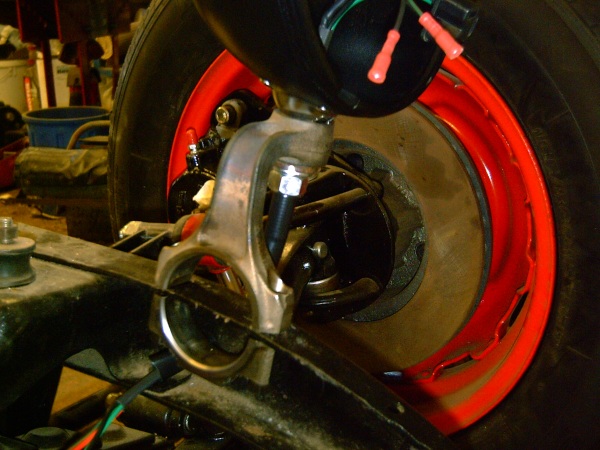
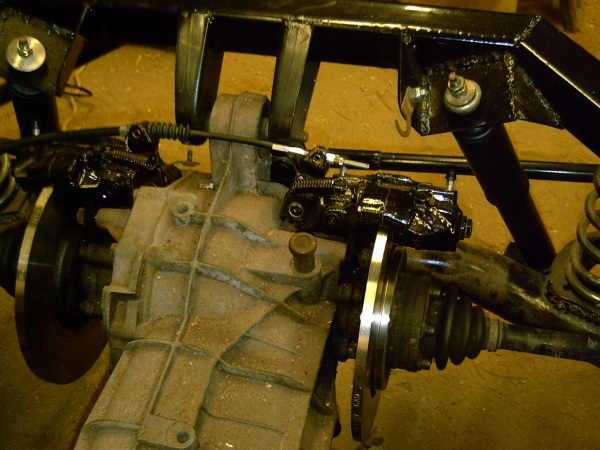
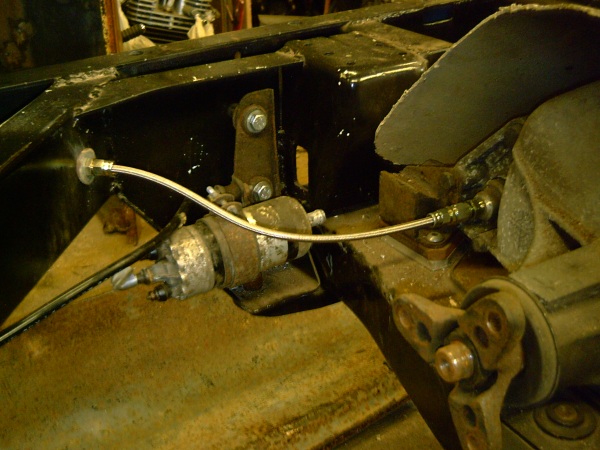
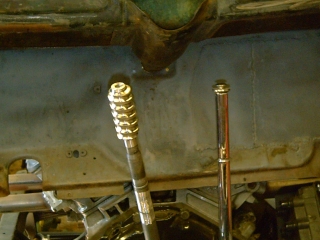
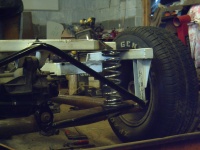
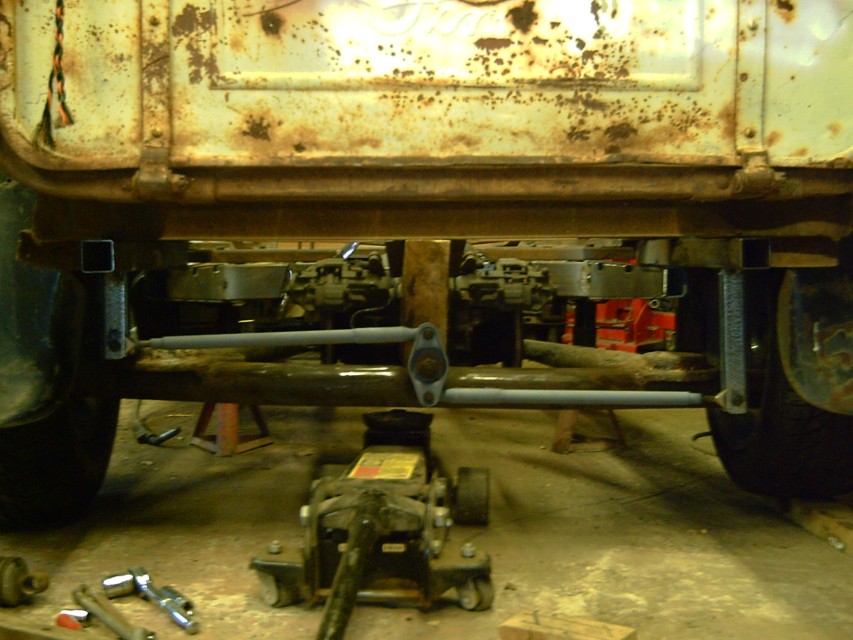
After much playing about I finally have the new rear hubs on. Pulling the old bearing out was a nightmare We snapped the M6 and M8 threadded bars and stripped the thread on the M12, Tryed a sissor jack and buckeled it before finalld cutting the sissor jack up and used it's thread rod, some heat and the old tap the case with a large hammer finally got the thing to move.
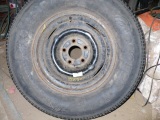
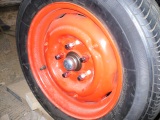
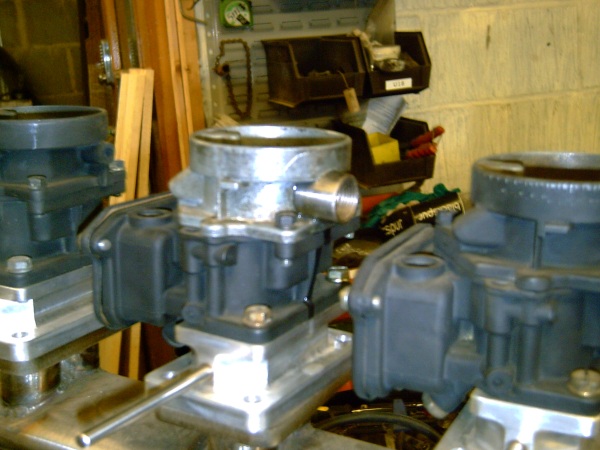
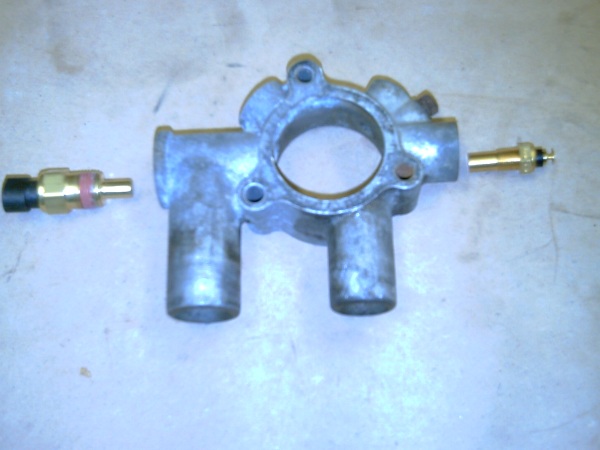
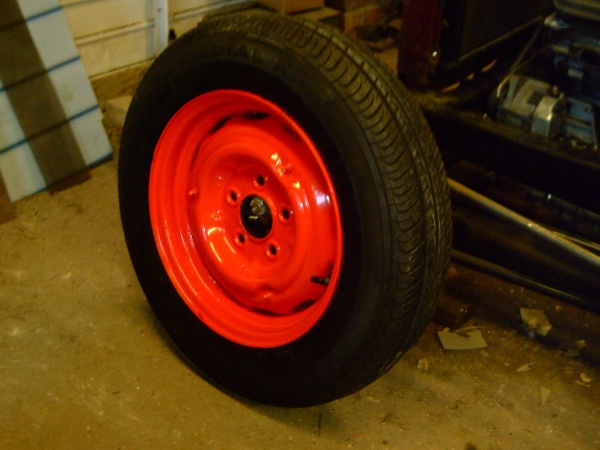
I now need to get the old tyres off, rims blasted and power coated before fitting my tyres, While I like the red front rims I am thinking of getting all four done in the dark grey used on the splash aprons. Keith and I have also been workinh on the throttle bodies, making the TPS fit the remade flaps,
04.11.12
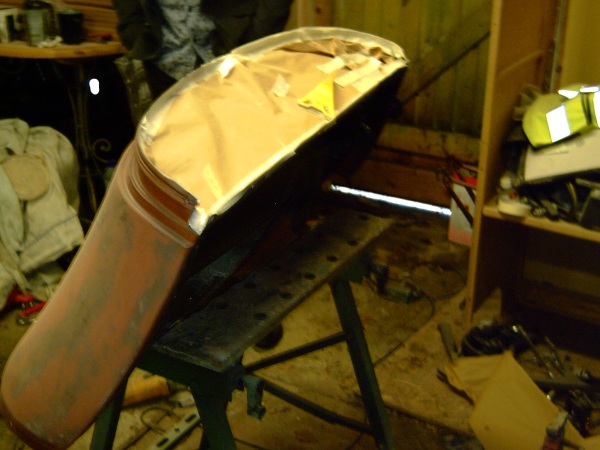
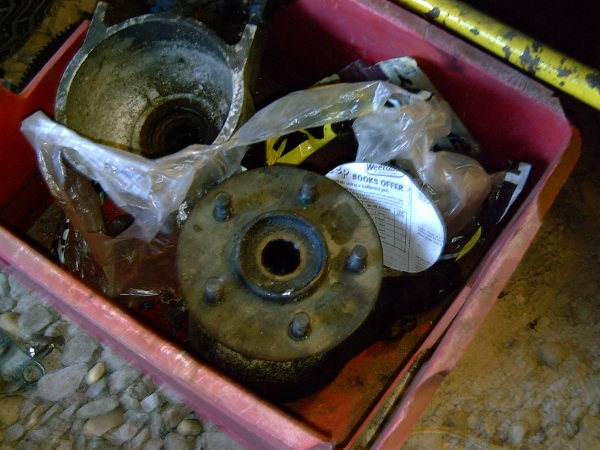
Despite not updating this site as ofted as I should over the past month I have still been tinkering. At the NATS I bought a pair of steel wheels in order to get rid of the Alfa alloys at the rear. the problem was that Alfa have a 5 stud on 98mm and I wanted to have Chevy-Jag front & rear which is 5 stud 4 3/4" or 120.6mm if you don't understand old numbers. CS Engineering had the job of melding together a pair on old Alfa hubs and a pair of Jag hubs. As part of the work Chris did on the rear hubs I needed ned rear studs and took the opertunity to buy a set of 20 acorn wheel nuts. I also bought a set of spinners but they lok better on Keiths 32 so the jury is out on them at the moment. Steering stops arived but due to the size of the calipers they will need to point forward. I am looking for a sheet of brass to remake the throttle butterflys as the current set leak to much air preventing tickover. Keith and I have also been working on timber for the roof covering.
 |
 |
 |
 |
19.09.12
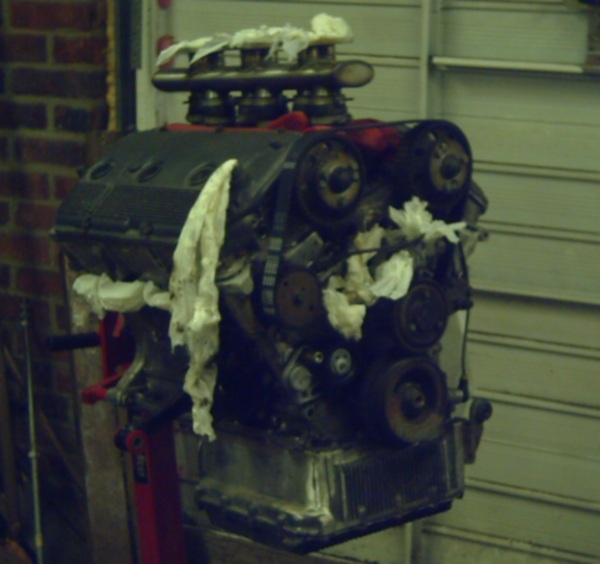
Still plugging away at the ECU program, I also have the little bits to finish off, the roof on for the show was just a tent ground sheet to keep the weather out, I need to get the vinyl one fitted, there is also a weep on the brake resivour. I have started the conversion of the rear axle to a jag/chevy pattern, jag hubs have been striped and the old studs cut off, after a little turning these will then get welded onto a spare pair of alfa hubs and then have replacement wheel studs added in place of the jag's fixed ones. I have glass, first qoute was for £250 so I found an alternative, closer to the real price of glass. Well if I can get the engine to run smoothly I plan to go to brass monkey, that also depends on the date as I am trying to visit sister inlaw in scotland over the christmas break.
01.07.12
Sorry for the delay in updating, lots going on but little to photo and write about, closing of all the little bits, without much success, the new water pump we fitted leaked, this will be replaced under warrantee once the engine starts, (I want to hear it run before I strip it down again.)
First attempt at starting blew a capacitor in the ECU, ECU needs to come out. this is now fixed,
Then ECU would not talk to PC, ECU out again, supplier get ECU & PC to talk first time, ECU in again and still won't communicate with my PC. turns out I have been back feeding 12v to the ECU via the fan relay.
This cured and we can now start the start process, Laptop on, ECU on, check sensors TPS gives no response, turns out early TPS is only a switch and not the throttle potentiometer I need for the ECU input.
Three pots from various cars and a new bracket get the problem sorted, next problem the wires now need to be reversed as the signal is different.
Now after a problem with the firing order I have an engine that threatens to run but just won't jump the last hurdle. Battery is now on charge for another volley of things to try.
The ECU supplier has been round and will be back to help. many thanks to Phil at Extra EFI who not only builds and supplies megasquit ECU's but helped to write the extra code so if anybody can get the engine to run. When it runs I will upload a short video, now I have to go back to reading the efi tuning pages.
24.03.12
 |
 |
 |
|
 |
 |
 |
 |
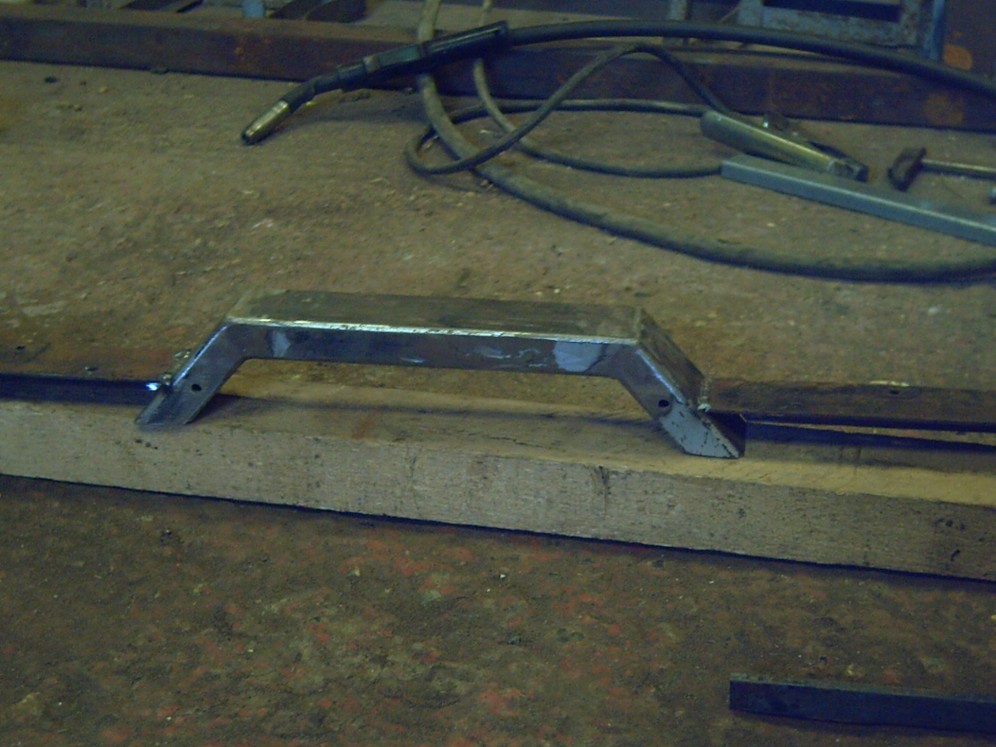
Still plugging away, built a seat, Keith just finished plumbing the brake lins and we have fluid in the master cylinder. Steve Jest made a great job of welding the master cylinder parts together for me I also started wiring the fuse box, by flashing wires across I know the starter turns the engine. I am looking to show the car on May 13 at a small local show.
I obtained another air filter to build a rev counter case, it just happened to be the correct diameter just to deep so I cut it up and took a strip out of the middle. This is then bolted to the main Model A dash I modified earlier.
29.02.12
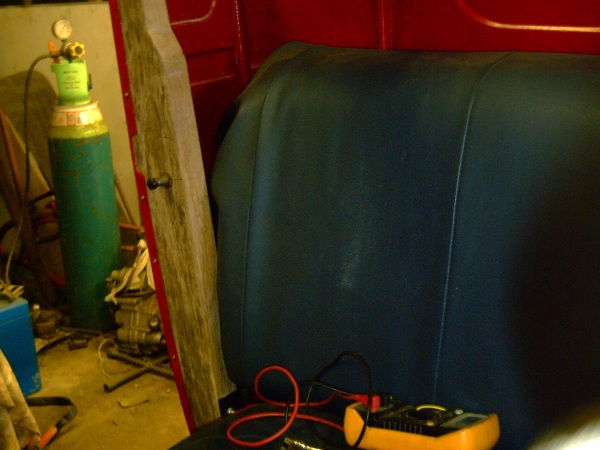
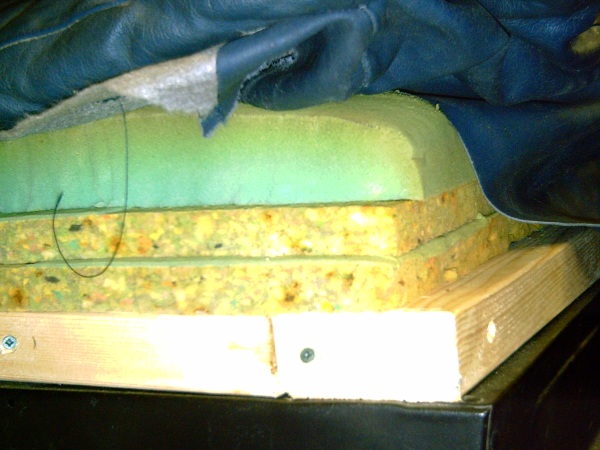
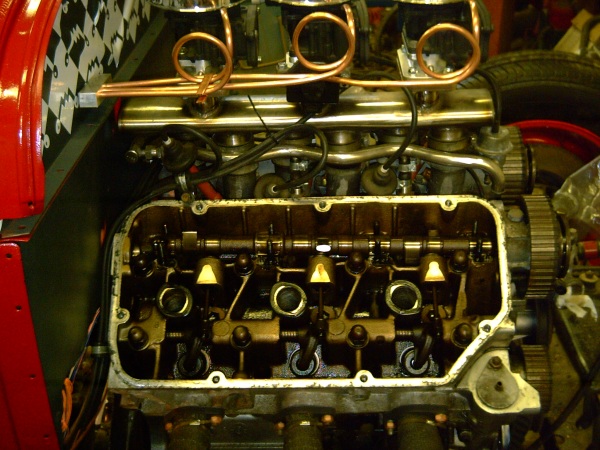
Well I am not moving as quick as I would like but I am still moving forward. the second head is now back on and the inlet manifold re-fitted, the rubber hose down the centre of the block has been replaced by a copper one. Bob let me have the leather from an old sofa with the dual density foam, seat back just needs netting to stop the leather turning the foam into dust as it rubs. I have also made a base frame with rubber webbing to give a softer ride.
05.12.11
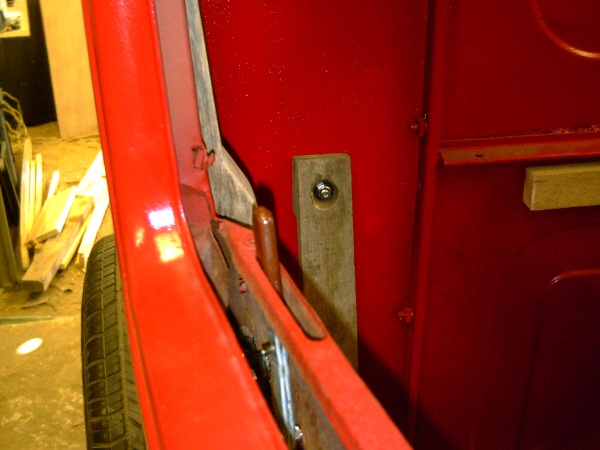
On the mend but still not doing much, the original plan was to have the car finished in august, before I have the kitchen re-fitted but due to the back problem the two will now overlap. I have door glass runners on order for xmas from my son. one of the cylinder heads has been re-fitted but I need to mount the new water pipe before I re-fit the second head. Master cylinder is still with the fabricator, I will need to get it welded when I get the parts. I will try and get time in the garage over the xmas break and some more pics.
22.10.11
Not a lot going on at the moment, I have put my back out an as such I am unable to work in the garage as present. Keith pops round and is able to do little bits, a new outlet to the fuel tank allows the battery cover to be made smaller and fit better, I have the master cylinder resivour being made, this is designed to fit into the original fuel cap. Engine still has its heads off after we found that one of the head gaskets had been damaged while the engine stood.
24.09.11
Well those who know me will know I did not make the NATS, not to worry theres always next year, or before if possible but today I had a bit of a set back, just got all of the heater hoses hooked up and started to full with water, a wet floor started us looking for a loose hose clip only to find a section of head gasket poking out from under the exhaust, Another engine strip down comfirms the worst new gaskets will be required.
07.08.11
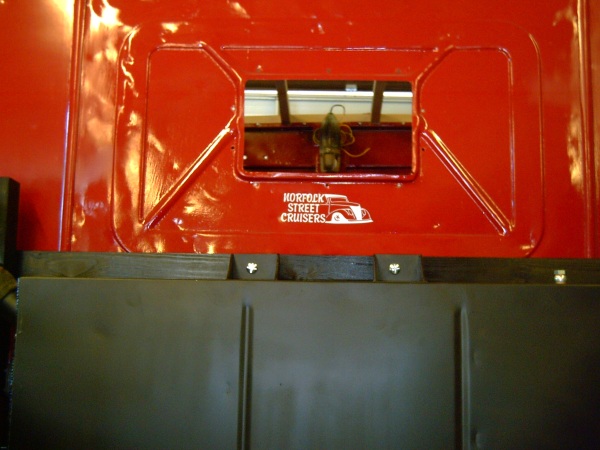
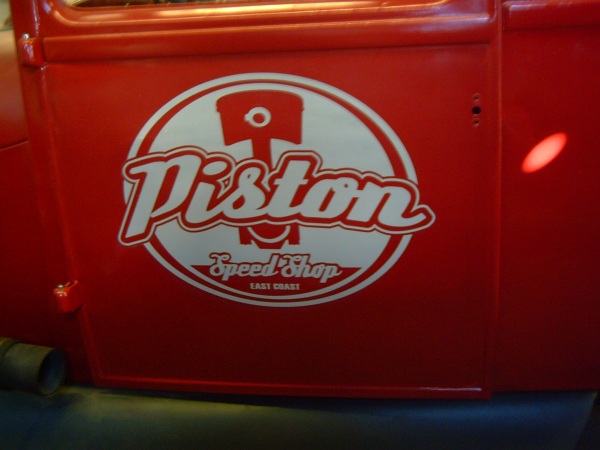
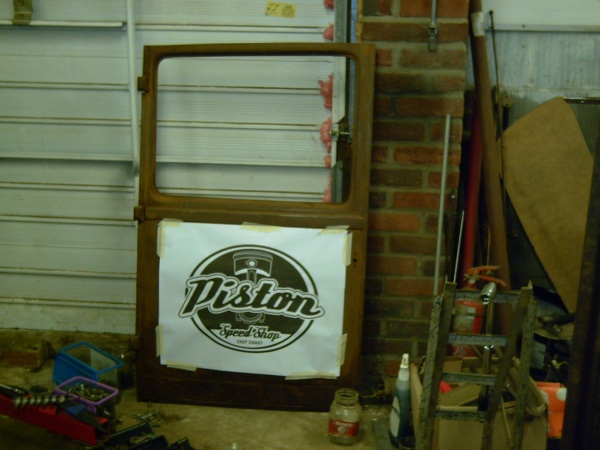
two days now before I go on holiday so what's not done now will not get done before the N.A.T.S; well not quite, keith will have garage keys and is hoping to tie up some loose ends. battery cover, stain on the buck timber. I painted the door art on yesterday, this is copied from a 'Piston Apparal' tee shirt, once again many thanks to them for letting me use one of their designs, with luck I will be parked outside their stall at the Nationals. I will not be ready to drive as I hade first intended, still too many little things to do. fuel-lines, brake reservoir, wiring, seating, oil & water, sealing the heating system. Once all that is done it will then be time to test all the modifications to ensure they all work. See you at Trinity Park
 |
 |
 |
 |
 |
 |
 |
 |
04.07.11
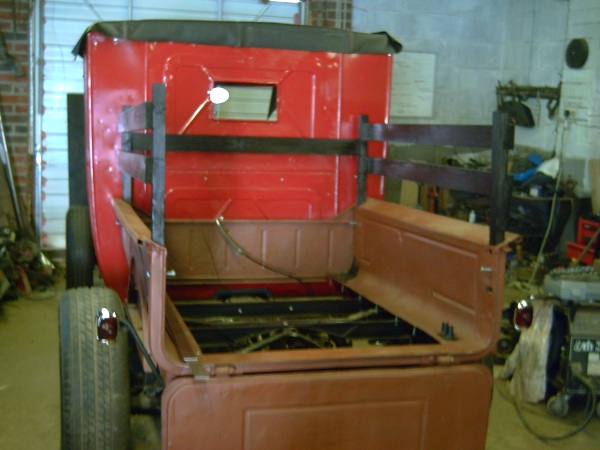
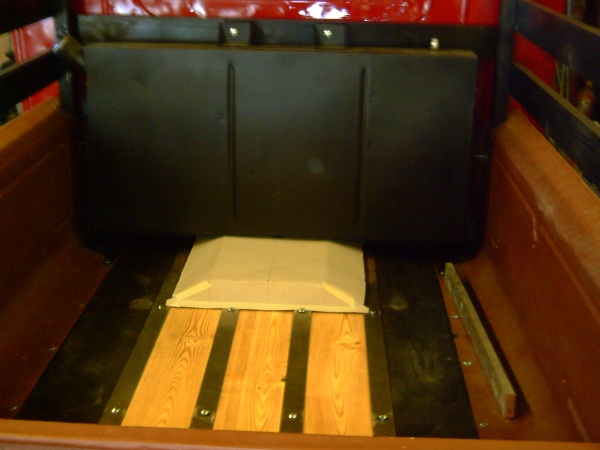
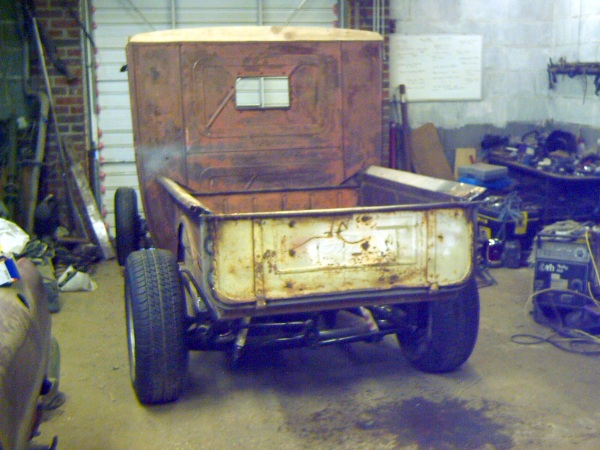
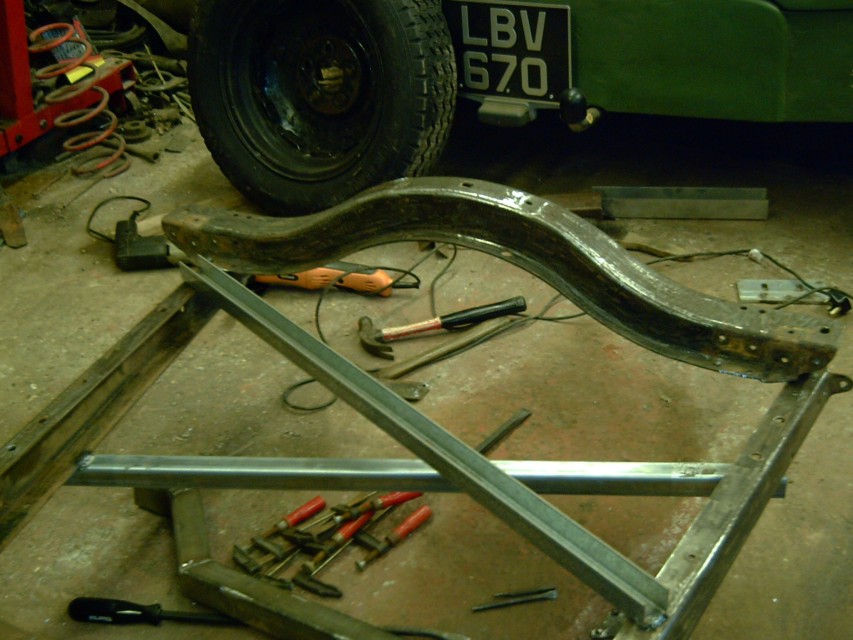
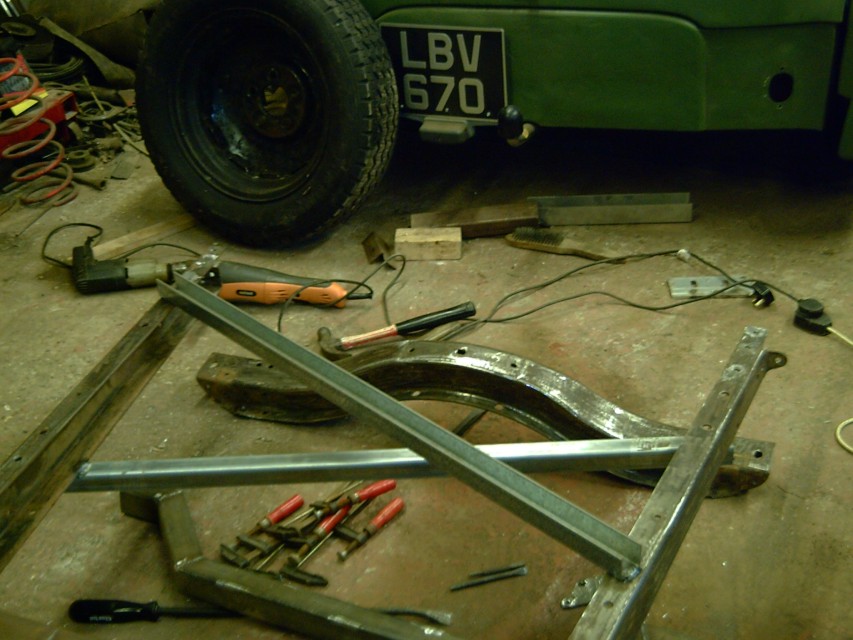
Panels have started to be bolted in place, we also started to build the stake bed as this will be needed to support the fuel tank, Alan has been booked to re-fit the roof this weekend all being well, throttle linkange have been drawn, blanked and I have started to fold them into their final shape
 |
 |
 |
 |
28.06.11
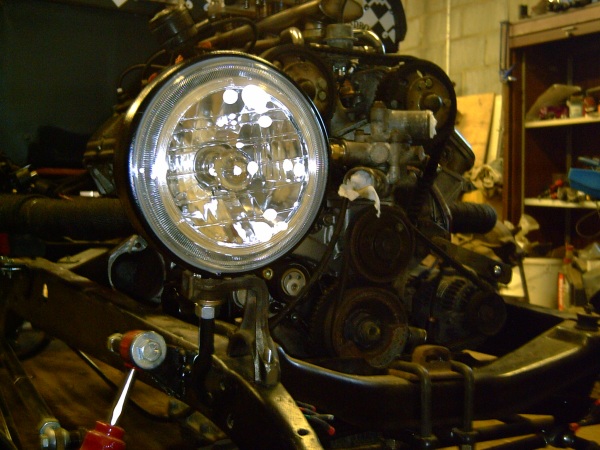
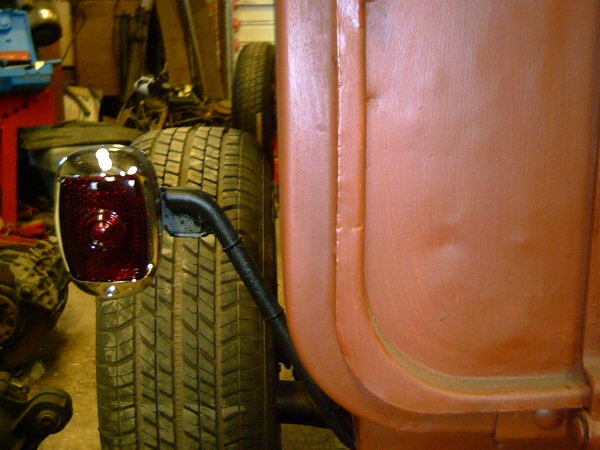
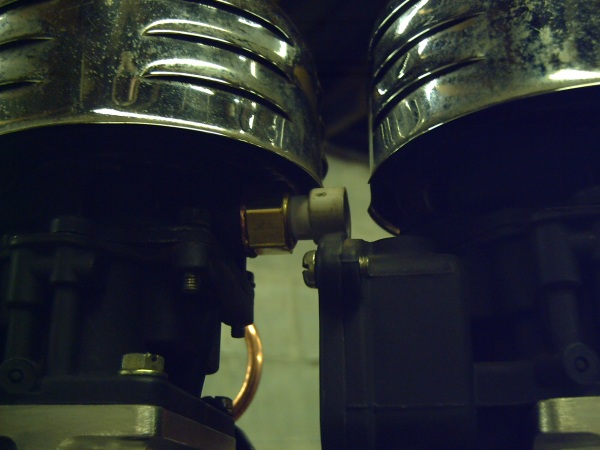
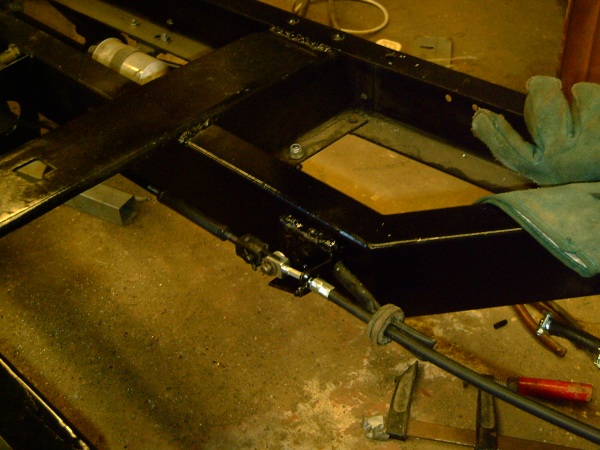
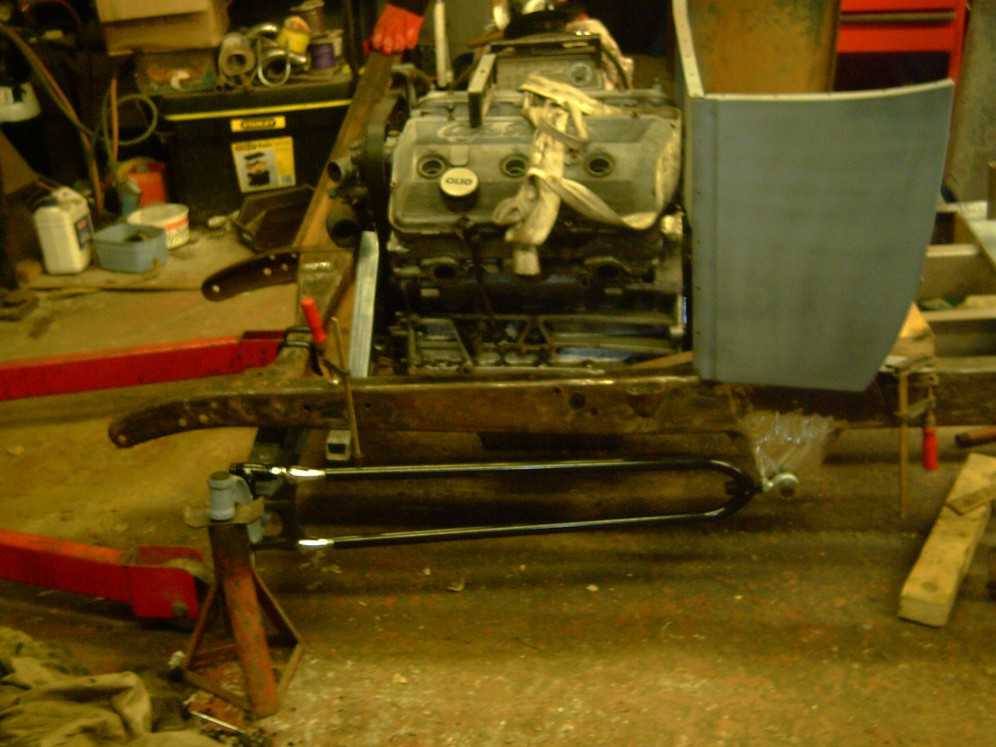
When I tightened the prop shaft bolts I heard a click, I feared that this could have been the timing belt jumping a tooth so I needed to re-set the engine timing from basics. as the Alfa is what is termed an interference engine you can not turn the engine over if the cams are out of sync, so the only way to ensure that all the valves are closed is to remove or loosen the cams. I have also included pics of the front and rear lights, fronts are angle eye design bulbs not LED so I intend to use the surround light as the front indicator, rear lights are Chevy with sections of anti-roll bar cut to make supports. Dummy fuel lines now terminate in a block that will be mounted on the bulkhead.
 |
 |
 |
 |
21.06.11
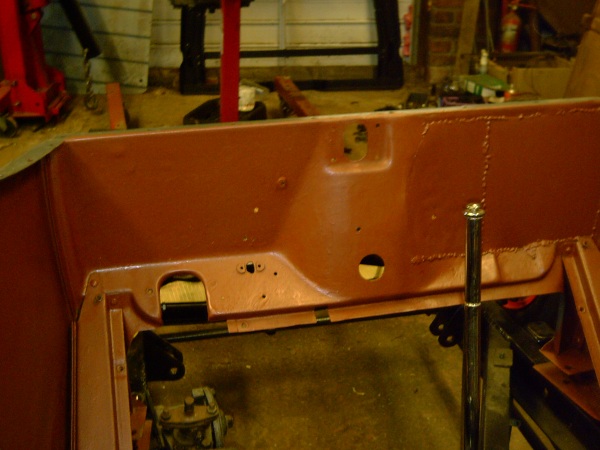
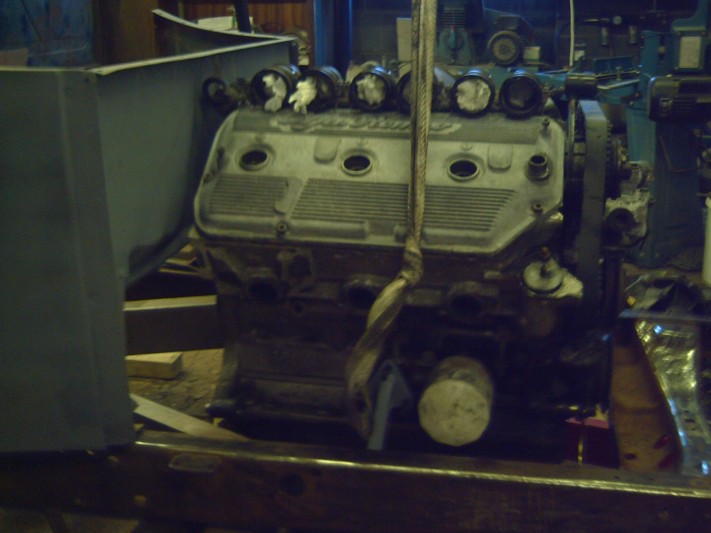
First panels are back from the painter, I fitted the bulkhead decal last night, now it seems I need to carry the decal into the lower half of the buklhead. I fitted the engine in on saturday
 |
 |
 |
 |
 |
 |
13.06.11
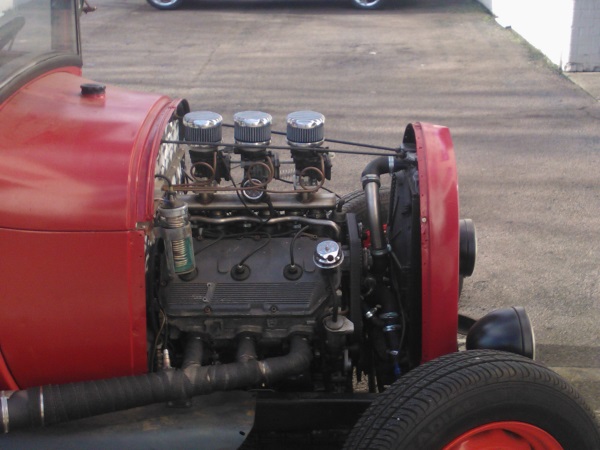
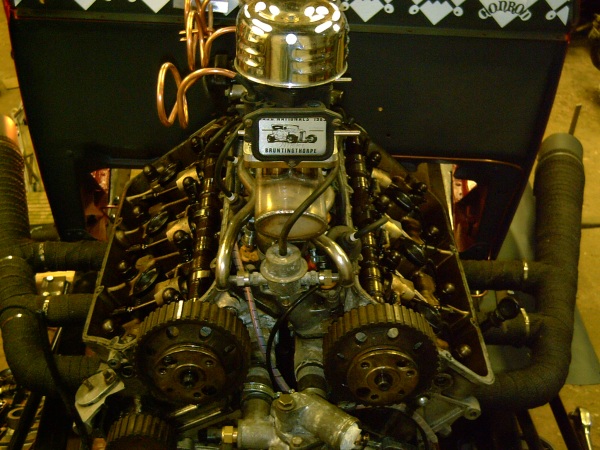
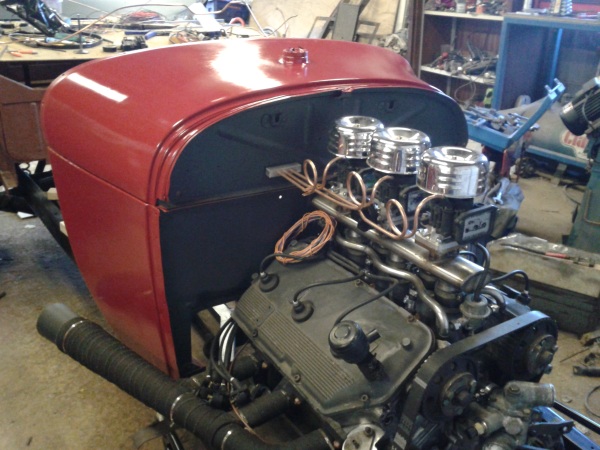
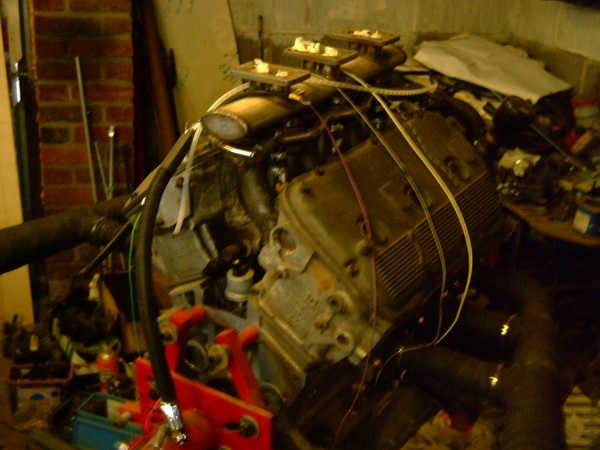
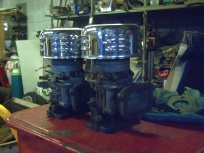
Full speed ahead, well it will be when I get the panels back from paint. I have not been sitting with my feet up, I have been working on wiring, mounting the carbs fitting sensors & trying to work out a linkage. The centre carb has to work backwards to the outer two because of the TPI sensor, and once I had the sensor positioned I did not like the look so I made some dummy fuel line to take your eyes away from the sensor.
I would like to thank Graham W for transporting the panels and to Neil at City Signs for the vinyl mask of the door art and for the vinyl bulkhead decal.
I made the headlamp mounts and fitted the lenses into the bowls, I also made a pair of front mounting brackets for the aprons and started on the main supports
 |
 |
 |
 |
 |
 |
 |
 |
22.05.11
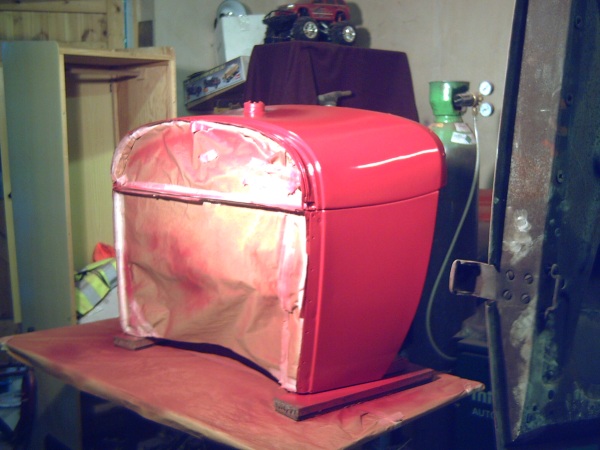
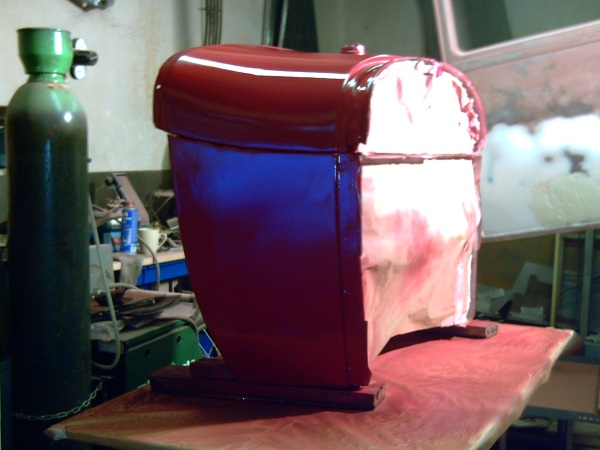
I feels like things are really moving on, yesterday the first coats of paint went on. I have chosen an Alfa dark Red for the main panels and Grey for the bulkhead, splash aprons and a couple of other odd & ends. Many thanks to Keith for his efforts on getting the doors repaired prior to his holiday, as first the plan was just to do the one door to get rid of the old boiler plate repair, but when cleaning the second door it looked like swiss cheese. I have finished the engine ECU wiring and made a start on main loom, starting at the rear lights and working forward.
 |
 |
 |
 |
18.04.11
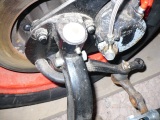
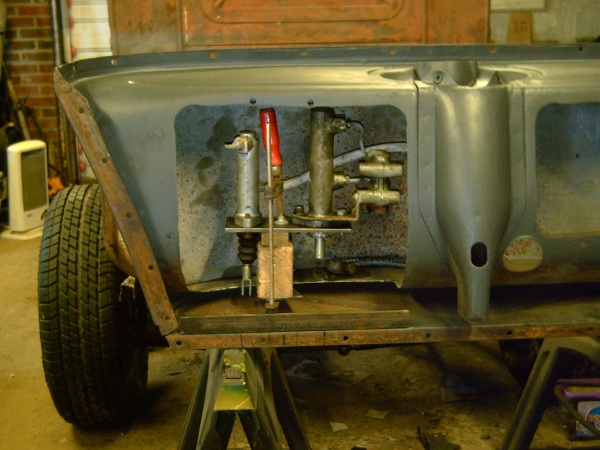
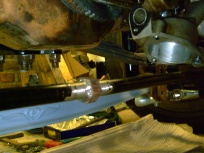
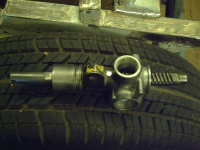
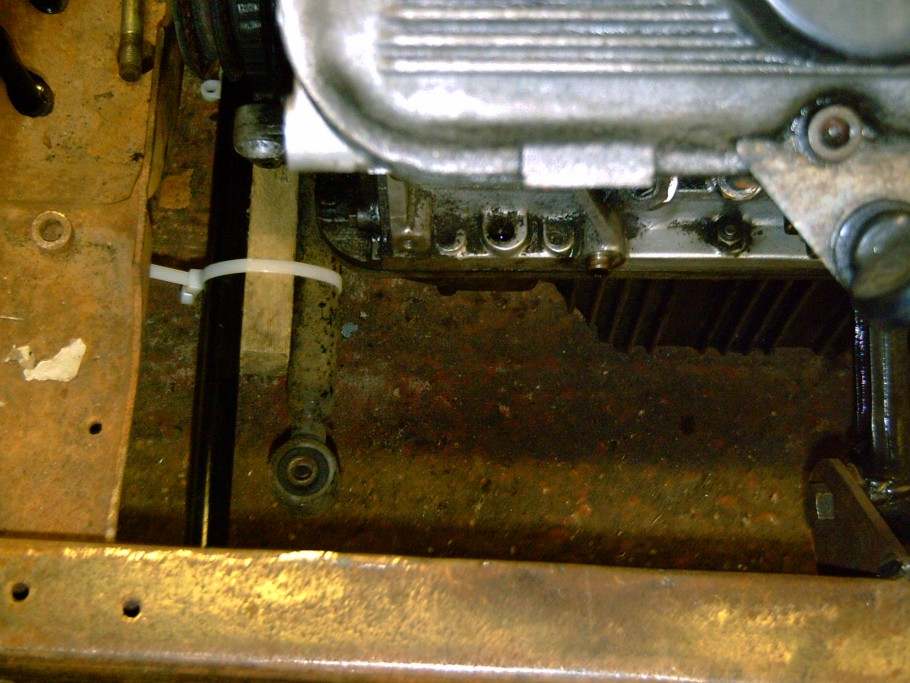
Still plugging away, I managed to get an original Alfa 75 handbrake cable, After drilling a hole into the rear engine support a simple link joins the cable with the lever, I still need to support the cable to prevent strain on the calipers, I intend to hang a bracket from the underside of the buck. Driveshafts are now on, I managed to get the Alfa 75 fuel rail to go in under my intake I needed to cut off the original inlet so feed will be via the 5th injector outlet.
 |
 |
 |
 |
22.3.11
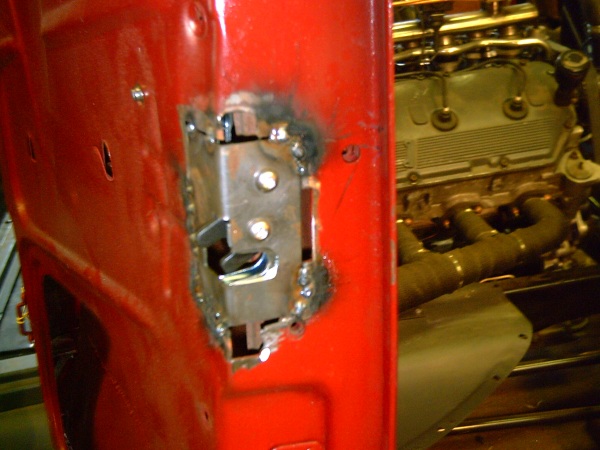
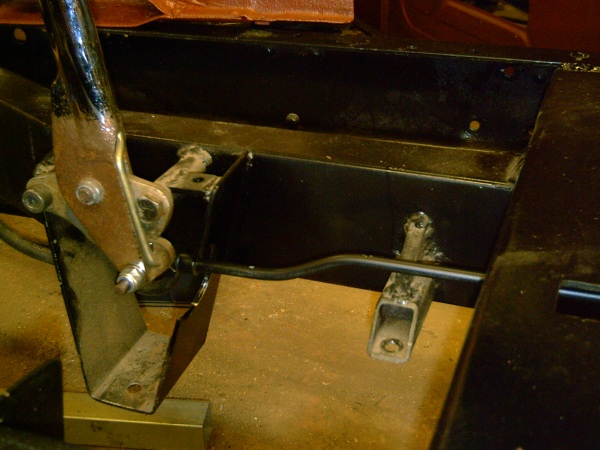
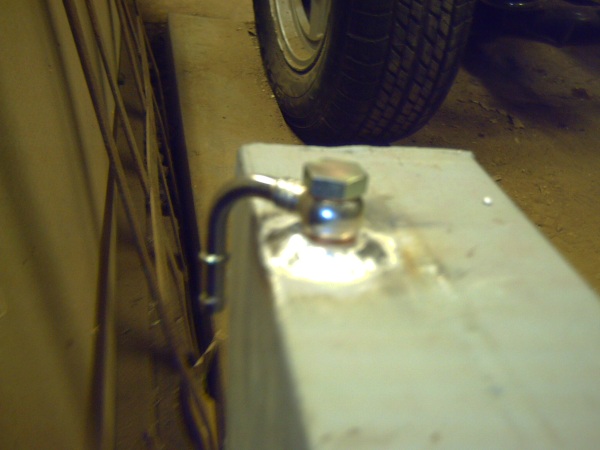
I have been having an e-bay selling spree so I had some money at the swap meet, I bought splash aprons,metal ones for just £30 the pair, I found that they had been shortened at the back which is fine by me as I didn't need them to meet up with fenders. I picked up a pair of door locks from Pop Brown and thanks to Julian @ specialists welding for welding in the return bung to my fuel tank and the propshaft adaptor. I also picked up from Julian a pair of Jag rear hubs that I am looking to adapt to the Alfa rear axle giving me a Jag/Chevy stud pattern all round. Mark @ Power & Performance sorted the clutch hose and will be called apron to do the brake flexes, I also had to move the fuel pump as you can, the original position clashed with the running board stays, I don't need the full stay but I will use these to hold the splash aprons.
 |
 |
 |
 |
27.01.11
Well here goes for another year, Cab back just mp, timing belt & a mechanical belt tensioner conversion. I bought new rear disc's as this was the only part of the brake system using old parts. needs the bottom corners finishing, the rear glass surround has been removed for clean up. Engine has now been reassembled, with new gaskets, water ump I am looking for adaptors for the water temperature sensors, I can't use the ones on the front as the end of the sensor would foul the fan. Talking of fan I managed to repair the fan, the blades were loose on the motor spindle. I have spent many lunch hours reverse engineering the proposed door art, this is so that I can change the size without the image being pixilated, I also printed out a copy to access the size on the doors.
 |
 |
 |
 |
29.12.10
Carb bases are with Logan at Hellbent Eng having butterfly's and shafts made while we are getting on with rear cab repairs. I received the last of the steel parts required on the buck for christmas, and I need to get an order for heatshrink and connector blocks compiled so I can get on with the wiring loom.
23.11.10
Thanks to Alan, he has been back to finish the rough pattern for the cab roof. We then took the back of the cab off to start making the repairs. I would also like to thank Trevor as I now have the rest of the engine service parts along with the second rear brake caliper.
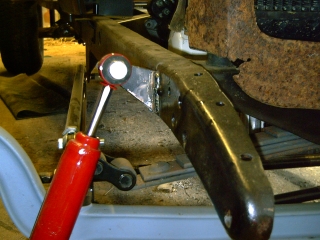
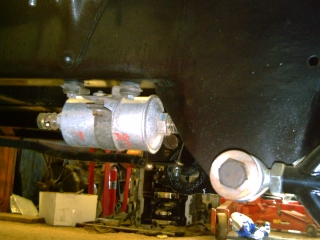
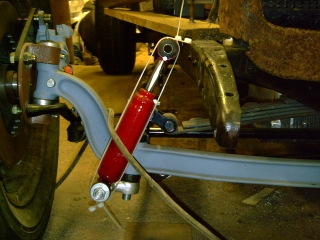
The last of the plates have now been welded to the rear shock mounts, this should stop them bending, We also mounted the heater, yes I know its on its side. I will need to turn it over as both pipes are currently at the bottom and it will be easier to bleed if they are both on top.the rear 3/4 shot shows the first of the rear lights mounted. I also had to push the A to the back of the garage as I had a cuckoo in the nest, Keith need somewhere to put the B for a few nights
 |
 |
 |
 |
20.10.10
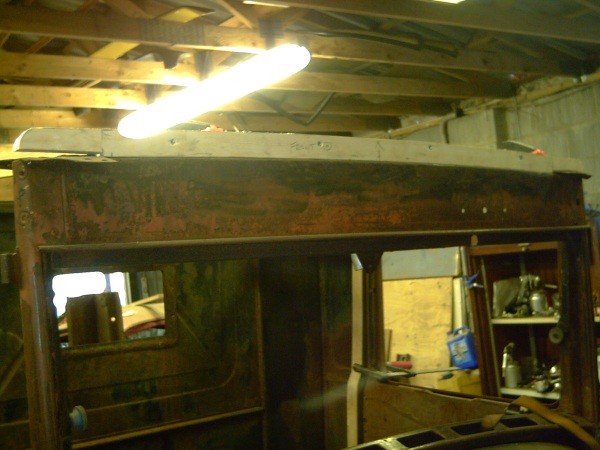
I have managed to align the bent door, a little heat on the hinge and a good sized hammer now has the door fitting. We had to make a few adjustments to alan's wood but on the whole it fits well and should not take a lot for alan to get it into shape. Keith and I also made a rivet snap so it won't be long before I manage to get the buck back into one piece.
03.10.10
A busy day in the workshop today, Started on the wood, one job that I am not keen on so I took Alan up on his offer to do it. today we managed the two door jambs and the rear seat /cab supports, we also started the pattern for the roof, this still has to be remade in Oak, One of my doors is not square so it will need to be straightened before Alan can finish the wood roof. On a non wood subject most of the buck repairs are now done and we need to re-assemble using rivets. I have also had a delivery of wire.
 |
 |
 |
 |
15.09.10
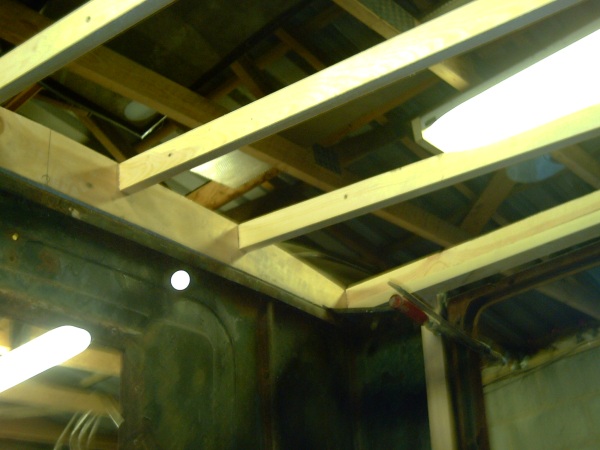
It may seem that not much has been done over the past month, what with the NATS and a week away in the sun to recharge the battery. but after the sale of the gearbox I have been buying the parts I need to keep the project moving forward. Injectors have been cleaned at emerald. exhaust wadding and wrap has arrived so we started building the silencers. I am still awaiting the last of the engine parts (gaskets, belts, pump etc.). I am now in Alan's hands for the woodwork before we can start the strip down and final build.
19.08.10
I sold some parts so now I have a little bit more money to put towards the 'A' build. I decided to buy reconditioned rear brake calipers and need to re-commision the engine. I have also been spending time drawing a wiring diagram and arranging a list for ordering.
I have arranged for the timber to be done by Alan after this years NATS. this should be the last of the fabrication jobs, that still leaves all the bits, wiring, plumbing, fuel lines etc. The plan is to be ready for Old Warden 2011.
01.08.10
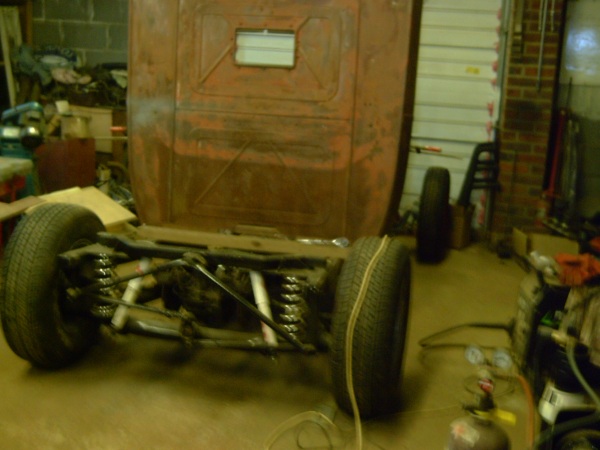
I had to move the 'A' out of the garage today, so I took the opportunity to take photos in the open air. Later I managed to part fit a throttle pedal, trial fitted the drive shafts rear discs and calipers, buck repair is also well underway. I liked the look of the 'A' without the buck, maybe a 5th wheel and a trailer.
 |
 |
 |
 |
17.07.10
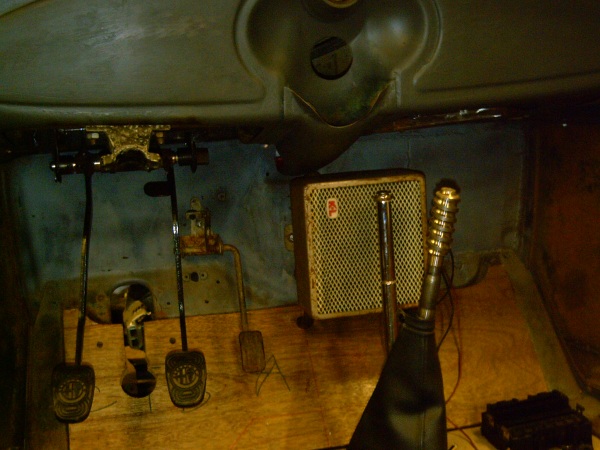
Pedals are finally done, they seem to work well to. Rear of the buck has had patches made to repair the holes, it felt like this section had corroded more than the rest as every time Keith tried to weld holes appeared. A mount frame has been made to carry the ECU and the Dashboard controller.
I still need to work out where and how to fit fluid reservoir, Wiring loom is drawn but I now have to mount the fuse and relay boxes, 16 fuses and 7 relays? its only an 'A' pick up what could need that much. Carbs are coming along, shafts and butterfly's still need to be done.
 |
 |
 |
07.06.10
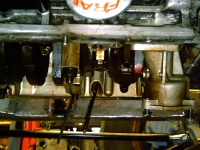
I have the EFI & the cowl off to make clutch & brake pedals. I also had a call tonight to let me know the carb base blanks are ready for collection, now I need to arrange shafts and butterfly's, I have also had some ideas on how to hide the throttle position sensor. Finally got the rear dampers positioned and the second time they did not bottom out when loaded. the read axle is currently off fir final welding and painting. One side of the cowl has the cylinders positioned the other shows the holes for the wiring.
 |
 |
 |
 |
01.05.10
The butterfly's are taking a little longer than first thought, my instructions to the machine st were not clear so I have the blanks back for marking up.
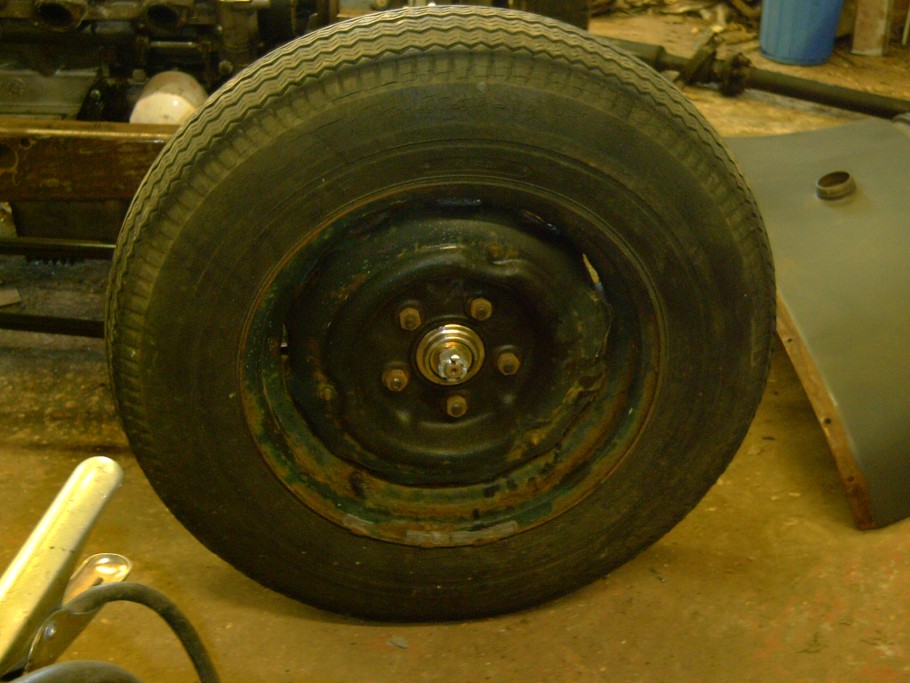
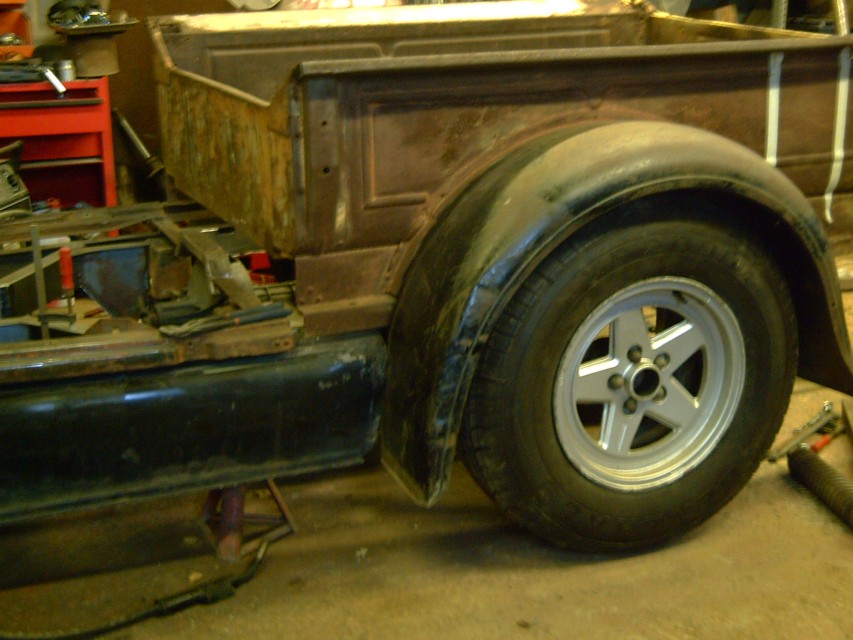
I have had the front wheels blasted, powder coated and the swap meet tires mounted, I like them but I know others think red wheels are for tractors
A location for the rear dampers has been identified and the brackets are being made. The ECU is also being made, a measure with extra software so that I can still run the original crank sensors and a ford EDIS 6 coil pack. As the six butterfly's would overwhelm a map sensor I will be running Throttle position , with only crank position, air & water temp. The fuel tank I bought from the swap meet will now have a sump fitted and sit between the bed rails at the rear.
 |
 |
 |
 |
21-03-10
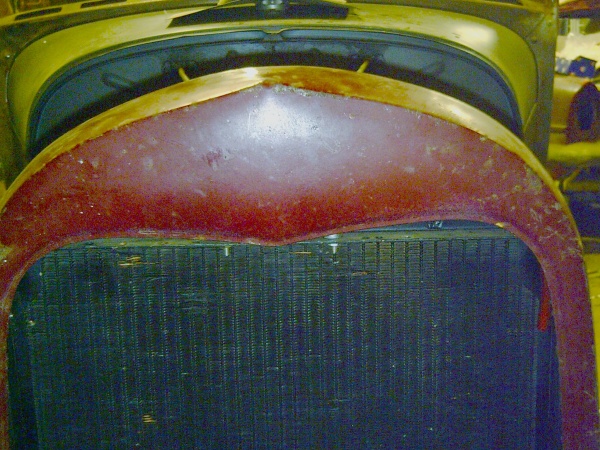
I bought a replacement grill shell at the swap meet, this one is steel but not original ford. notice the lack of rad cap and other holes. I think it looks cleaner.
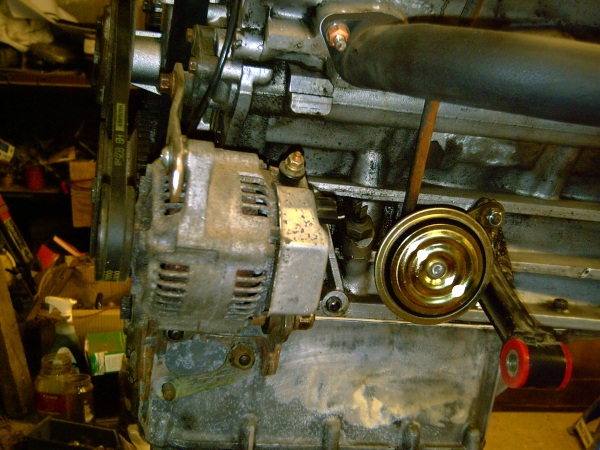
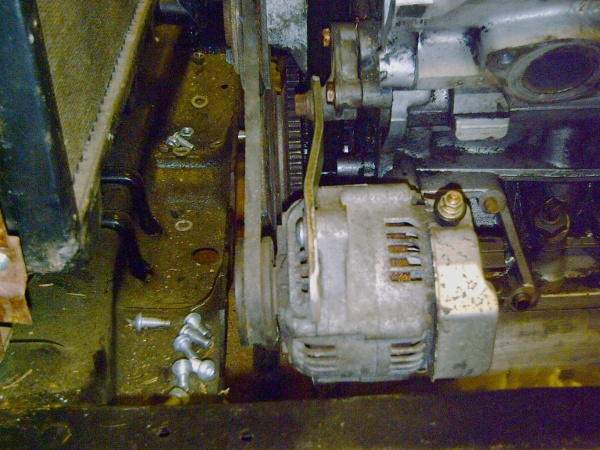
I also managed to get the alternator mounted, I had planned for it to fit at the gearbox but this would have taken to long.
The cab back is layered in place to try the fuel tank I also picked up at the swap, the jury is still out, seating may not be the best place to make compromises.
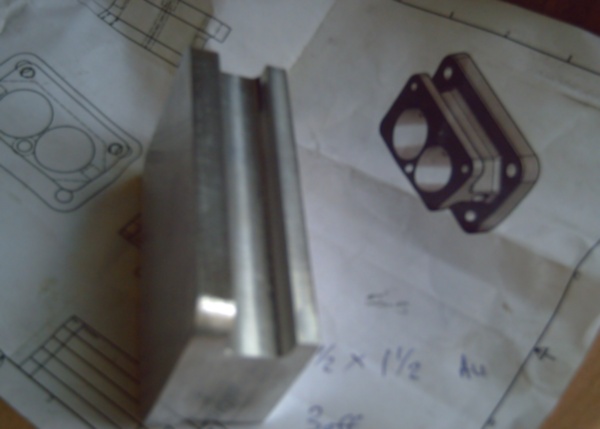
Work you can't see. carb bodies are being made as we speak, drawings for propshaft adaptor are being final checked before manufacture, why an adaptor well two fold, one I had intended to run the alternator at the rear so this would have been the pulley. two Alfa use different propshaft bolt patterns between the 3L V6 and the 2L inline 4. due to the light weight of the A I am current running the 2L gearbox but what to be able to change if this proves not to be the best option.
 |
 |
 |
 |
27-02-10
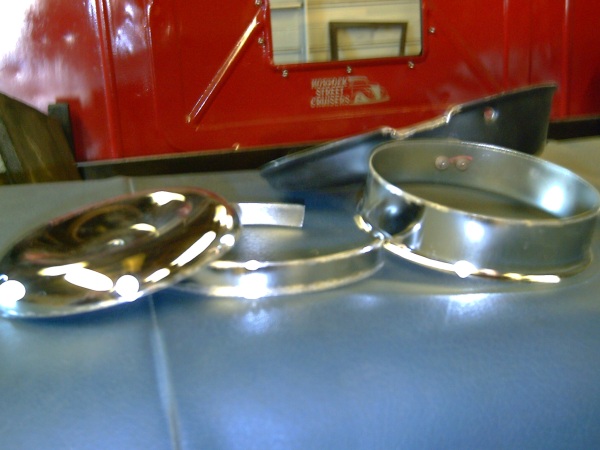
I have a pair of headlamp bowls, one needs work, I will add pics later. I have finished drawing the new carb bases, these are now out for manufacture. exhausts have had the front tube added, just need to add baffles, paint and maybe wrap. steering column welded into a one piece item, added some fuel lines, Swap meet next week I don't know what I still need so just keep my eyes open for a bargain.
25-01-10
Another Year. time to get on and do more work. over to past two months I have not done a huge amount. the bottom of the steering column has been made but still needs to be fixed, still working a design for the pedals that hides master cylinders in the dash. trying to decide where to locate the fuel tank, buying parts for the EFI/carb. I also bought a 1952 James motorcycle just incase I did not have enough to do.
10-11-09
Welded manifold is just back from Julian, many thanks. looks good, next is to get three carb bases made to act as throttle bodies for the E.FI.. I also have a small alternator from a hi-jet, the original plan was to rear mount the alternator but I will keep that idea for a future rebuild. I am still working on the drawings for the pedal box.
 |
 |
 |
 |
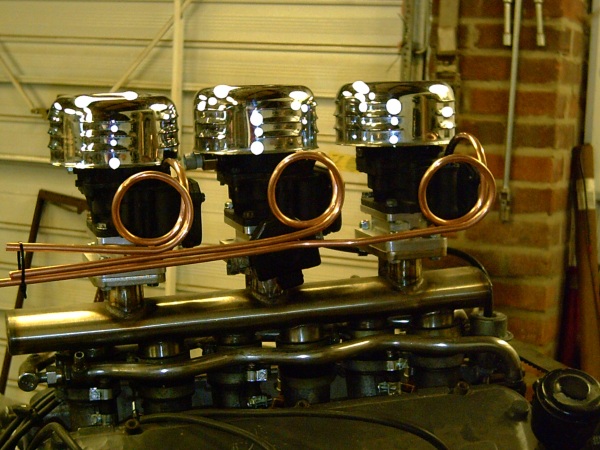
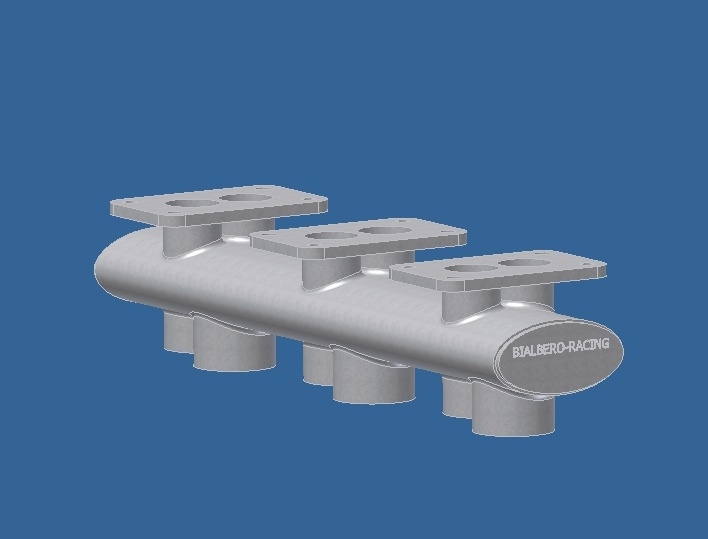
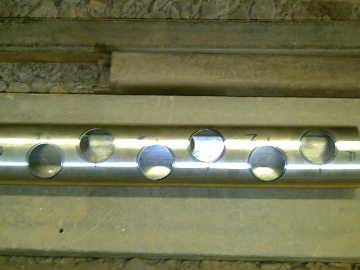
How do you fit three twin choke carbs onto an Alfa V6
Idea -- 3D Drawing -- Oval tube -- Drilled -- Short pipes cut -- Flanges lazered -- all shaped to fit -- Welded.
31-10-09
Lazer parts have arrived for the inlet manifold so I am off to see the welder. I had a sub floor made in sheet aluminium to fit under the seat base. Still not sure on a fuel tank, I thought of converting a pair of jerry cans or trying to reuse an early tank from something? both would have potential problems, I am informed that side tanks behind the splash apron do not work well with EFI so I am reluctant to go that route. I am still looking for a short piece of 2"NB tube to finish the steering column, I also need two smooth bends to finish the exhaust manifold.
12-10-09
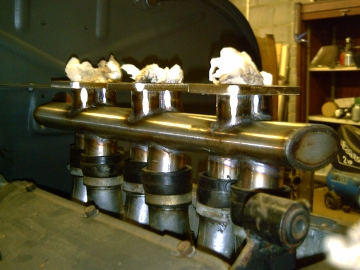
Inlet manifold has been drilled top and bottom. all the tubes have been cut, we just await ends and carb flanges before I can take it to Julian for welding.
The prop shaft pic shows how much Richard had to remove when placed next to an original one.
In order to be happy with seating and steering wheel positioning we hung a door and mocked a seat. we then got silly and mocked fenders and running boards. In years to come these may well be re-attached, but not yet.
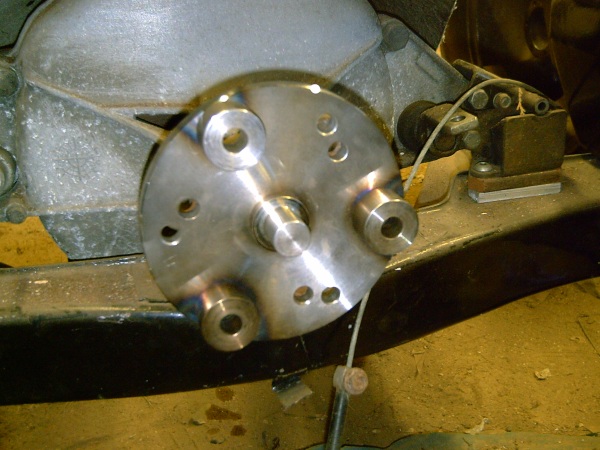
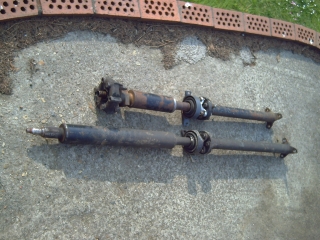
I finished striping the Alfa 75 in the garden so I have a spare rear axle to trial the Jag rear bearing conversion, this will then allow the use of jag/chevy wheels all round. FYI while Jaguar & Chevrolet share a common lug pattern the jag uses a larger stud, so chevy wheels will not always fit on Jag hubs.
 |
 |
 |
|
28-09-09
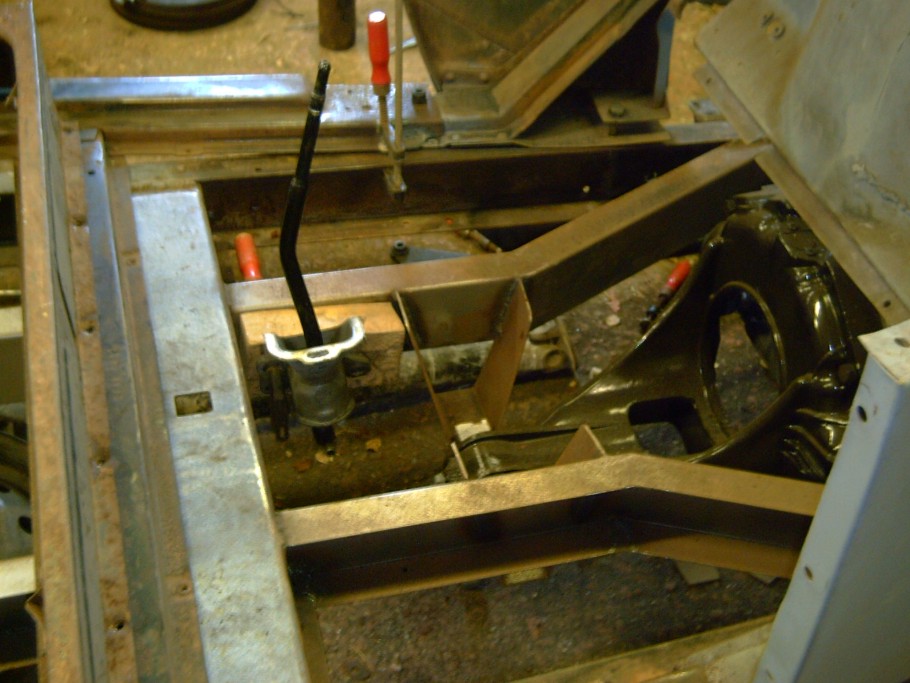
Found a steering column with the correct spline size, where? in the spares shed! I had one all along. Made a shift extension as the original looked lost on the floor, Mounted fuel pump & filter. worked out most of the steering column which is currently away being welded. cut the damper mounts to suit my damper heights and welded them into place. Next job is to design and make pedals to suit the Alfa master cylinders. I will not be fitting a servo, light car big brakes no ABS so no servo.
 |
 |
 |
 |
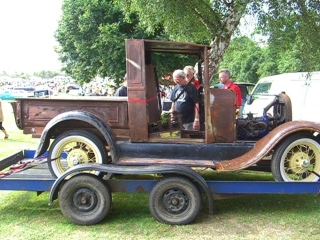
15-09-09
As you can see it made the NATS, and the show field. Now I have a year to make it start, stop & steer.
Not planning any further bodywork until then. well maybe floors and seats time and money permitting.
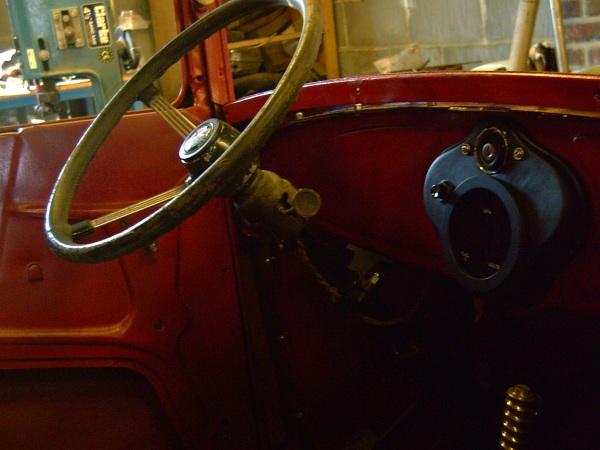
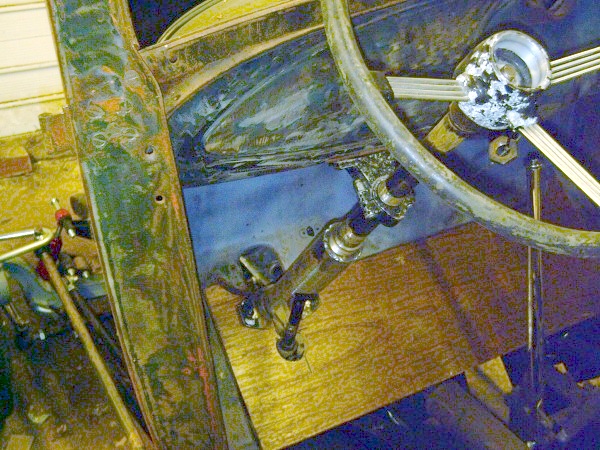
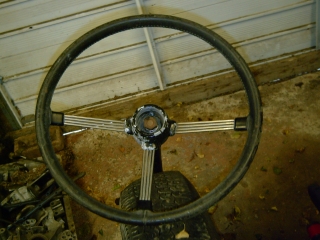
Last photo shows steering wheel, I just need to find a way to join it to the box
 |
 |
 |
 |
20-08-09
Last weekend before the NATS. What's not done is not likely to be. this includes the inlet manifold as the flange order has been misplaced. What is done, rear header pipes and exhaust cones are mounted, this is awaiting mandrel bent bends to make the front pipes. Grill shell and rad are mounted, EDIS coil in mounted under floor on off side with a cover from the front. shortie shocks will need new mounts so I have set one at nominal ride height so that I can cut down the mounts.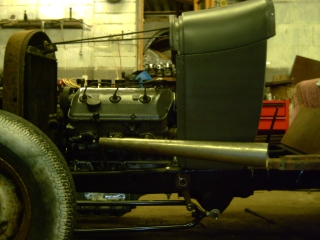 Exhaust Cone |
 Setting block |
 Set damper ride height |
 EDIS coil |
Coil Cover |
As Above |

Rad and grill mounted |
EDIS coil |
21-07-09
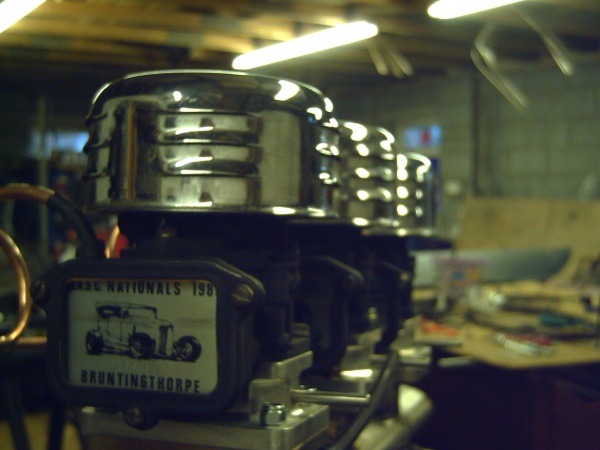
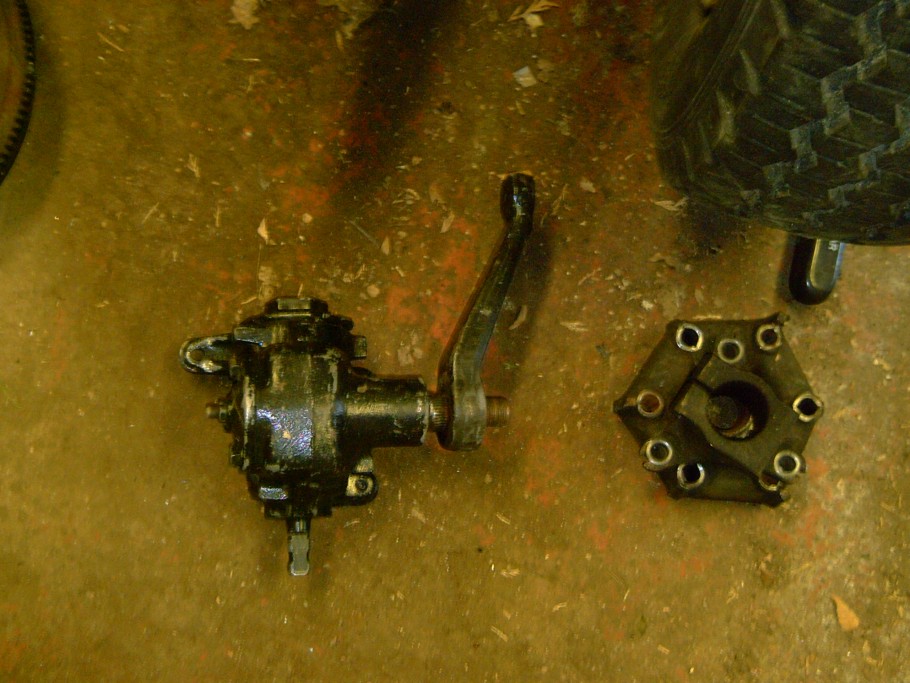
Steering box has arrived, it has now had the mounting brackets made and fitted to the chassis, I also have the last of the Nikki carbs so a full set,. Stainless oval tube for the inlet manifold is also bored ready for laser cut inlet flanges, end plates, engraving, and welding in the pipes. Chassis has now been stripped, all welding finished and awaits paint. Black! not white as in photos.
I am planning to trailer chassis to the NATS so if you want to see it now's your chance.
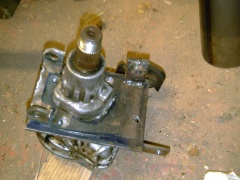 Steering Box mount |
 Chassis Cutout |
 Awaiting Paint |
3D CAD image |
21.06.09
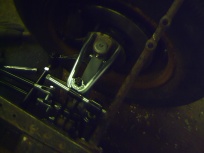
Gearshift is mounted, linkage shortened and selecting gears, handbrake is also mounted. I just need to get steering sorted, I will speak to T2D (type 2 detectives) on tuesday about handing of VW bus steering boxes before I start to mount the beetle box.
Talking with the casting people we may end up casting all three parts of a cleaned up nikki along with two half's of an inlet manifold. and exhaust flanges are drawn and with the laser cutters.
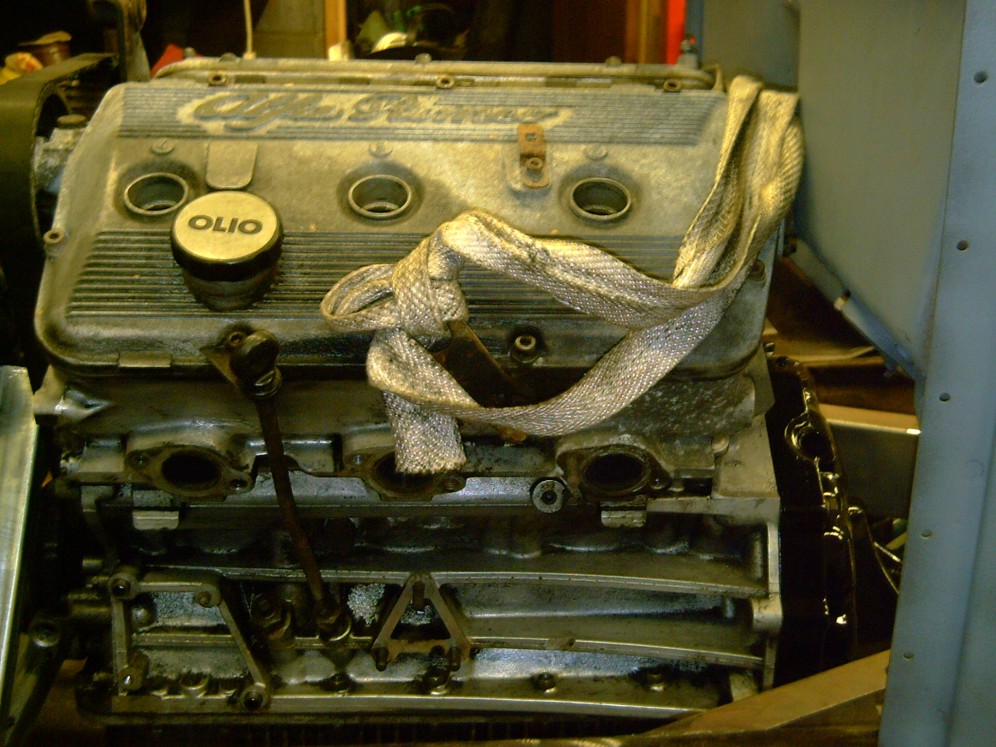
When starting any new project it is always worth looking at what came first, I found an Alfa powered 'A' roadster in OZ running the alfa inline four, seems Brett is now fitting the V6, good luck on your swap. He also informs me that there are now 7 alfa rods either finished or under construction, almost enough for our own club.
Steering box on order from ebay, now looking for the last Nikki to complete the set, and finally got the Alfa 75 sump to fit.
I now have two Nikki carbs, one to go, I may still cast my own base as not all Nikki's seem to be the same.
 |
 |
 |
 |
14.06.09
A close call last night, almost lost the garage and the 'A' to fire, we were told by the fire brigade that part of the fence had been smoldering for a few hours, ( that one down side of cooking on an open fire in summer, I knew I did not like barbeques) I was lucky to get away with melted fascia boards and scorched rafter ends.
That has not stopped the weekends progress, beetle box looks good I just need to get it mounted then a pitman arm made. birthday presents arrived during the week so I no have a drag link steering arm and two exhaust cones, We also shortened the cross link and added a nut to help when the time comes to make adjustments.
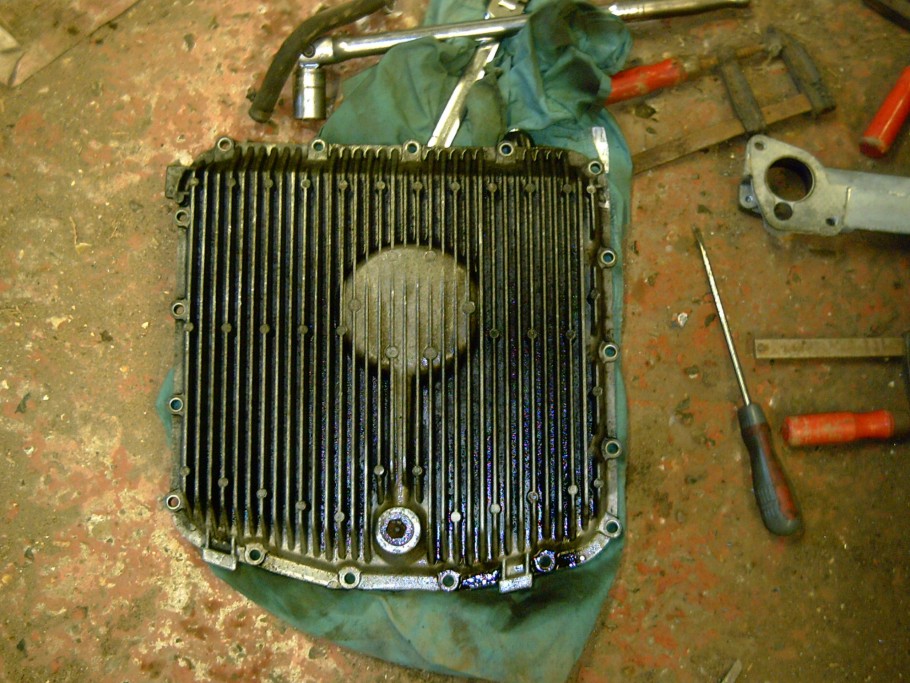
31-05-09. still trying to remove the oil pump, without any luck. progress on steering i hope, I have been offered a beetle box, this looks to be the right size and is available new at a sensible price in case the old unit is not serviceable. I also had thoughts on the rear dampers, levers. I could not afford stromberg 98 carbs so I have started to strip down a Nikki twin choke unit, the air cleaners fit now to revisit the inlet manifold I had drawn in 3D as the original plan called for 3 carbs and now I may only use two.Old oil pump is playing hardball and refusing to come out without a fight, I can't get the new sump in place until the new pump is fitted.
 |
 |
 |
 |
23-05-09.
shortened rack is made and prop is due on tuesday, cinquecento springs were replaced with a pair of jaguar ones removed from the coilover unit, this gives a flat top and bottom face.
there is still no room in front of the engine for a cross steer arm, I was hoping that the rack would give just enough room so now it is back to a drag link steering system, next problem is that the vega box needs to be reversed, not sure if this is even possible on the vega box like it is on a corvair box.
18-04-09 I picked up some machined parts for the new prop shaft and now I have a prop. I also made the centre mount
having bought coilover shocks for the rear we are now looking to fit a pair of lowered springs from the front of an old cinquecento, they look as if they will work well
Just before the swap meeting I acquired a doner alfa 75 3.0V6, the same one I enquired about at the start of the build, the owner had decided that he was no longer going to get time to fix it up, a little dealing and I now have the missing pieces of the puzzle.
The flywheel starter ring is further back than on the 164 so I now need to make adjustments to my starter mounting to get to run in line. I have a shifter, the prop shaft and other oddments I needed.
I also bought a pair of dampers from e-bay, I should have bought rose end type so now I have to adapt the eye ends to pin mount to allow the correct degree of freedom to prevent binding.
I hit a hold up in that I needed a steering box and rear dampers to get the chassis rolling, I held off spending money un till the swap meet at I knew I would get more for on my limited budget.
I now have a vaga steering box, with pitman arm and mounting bracket, Now the fun starts as there is very little room in front of the engine to run the cross arm.
As the engine has a very nice and deep finned sump it would seem a waist to cut into it, so other steering ideas are being explored.
Keith bought new wheels for the 32 so I now have a choice of rear tyre's 235-70-15 or 235-60-16 also a choice of 15" early jaguar wheels 16" Riley wheels or a rear set of 17" alvis wheels (all skinny) .
 |
 |
 |
 |
 |
 |
 |
 |
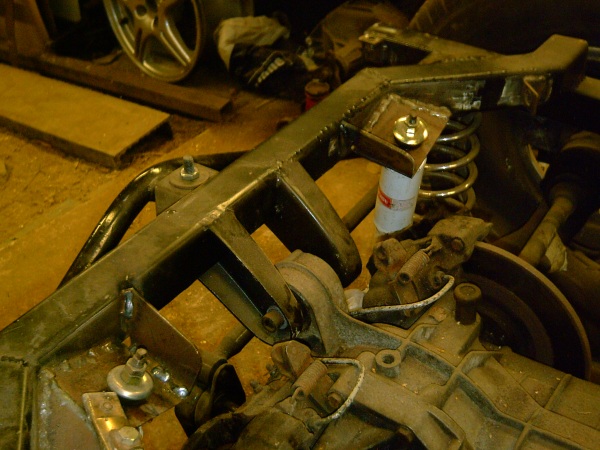
beam is set as close to ride height as I can, about 1/8" high 3mm to the younger audience. engine was located and braced but allowed to tilt front to back, rear mount has adjustable carrier until final welding.
 |
 |
 |
 |
I have a number of ideas on the engine, mainly to make it look at a quick glance like an old flat head, I know EFI is the way forward but there is every chance this engine will be running four downdraft bike carbs, on a home made manifold. If I decide not to run bonnet sides there may also be a set of exhaust pipes to look like the old hot rods.
In the final version the truck will be fully fendered but in order to start using the car first time out will be a much more basic form.
Sorry for such a long gap before this up-date
I little home work tells me that the rear wheel bearings used on the Alfa rear suspension are larger than the ones used on a Jaguar IRS. I will need to investigate further to see if this would be a good way to change the stud pattern at the rear to match the front.
 |
 |
 |
 |
Boxing panel finished welded, now time to mock position of engine and bell housing mount. these need to be done with the chassis carrying the weight, the engine and gearbox can now be aligned.
I also had time to make a start on a starter motor adapter as the RWD bell housing has a different pattern to the auto boxed donor
 |
 |
 |
 |
Well all the parts for the front suspension have now arrived. many thanks to Steve Lang for his help. I have not been idol while waiting, lots of cleaning and painting of the parts I did have. I also striped apart the steering column removed the shifter boss, I am trying to decide the best way to hide the hole, know any good cast alloy welders??
A list of the final welding tasks highlights just what is left to weld prior to chassis paint. Engine mounts, Bell housing mount, Panhard mount, Steering box mount, and two air bag mounts for the rear axle. I would also like to mount the alternator under the car keeping the engine bay clear.
 |
 |
 |
 |
I hope to change the rims to a plain steel item, but these will do until then, rear tyre's are 235-70-15. I am also trying to decide if the buck is to long??
Well the vauxhall has finally gone to a new home. Chaz has great plans which include a hot 350ci small block(400bhp)
I did get an e-mail after collection saying that it was in better shape than he had hoped for.
Back to my build. A complete front suspension has been ordered from Steve Lang, I have also been busy while I await parcels, the V6 is now out of the donor, the gearbox is being cleaned, engine mounts have been made using a pair of old big block chevy con rods, and as usual the idea of a very simple column has been replaced with a tilt unit from Gays last bash that I will need to rebuild before it will do what I need of it.
The Valhalla should also be sold and collected soon. It could be time to buy the front end soon and get the chassis rolling.
The overall look will now be fully fendered and lower than stock with 60-70s rake.
One wheel on my wagon.
Still playing with the rear chassis. drop mounts for the watts linkage, the long one will need a brace, not sure about the shorter one. these will take all the side load of the rear suspension
Finally I have the Vauxhall out of the garage (should have been collected but still sits in the drive) at least I can get on and mock up more of the 'A' and finalize some of the details.
I now have an engine and gearbox, Now I know this will cause debate but I managed to get hold of an Alfa 75 gearbox and axle as originally planned. as I said before this was not a forgone conclusion as I had a hard time finding the parts at a sensible price. I have always fancied building a car with this set up since seeing a 32ish citroen pick up part finished in a copy of custom car. The late Paul Gibb was also planning a similar setup into a later ford pick up.
 |
 |
 |
 |
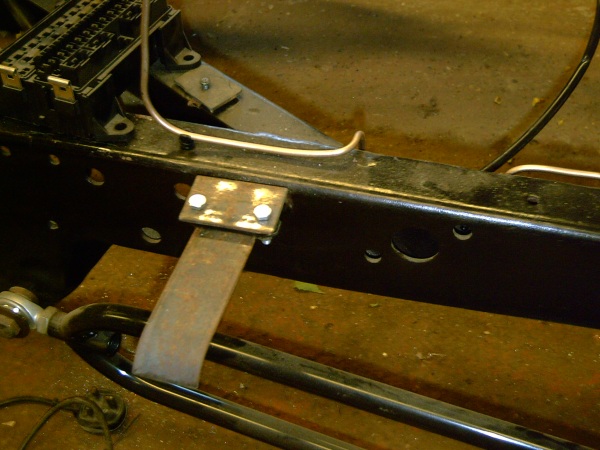
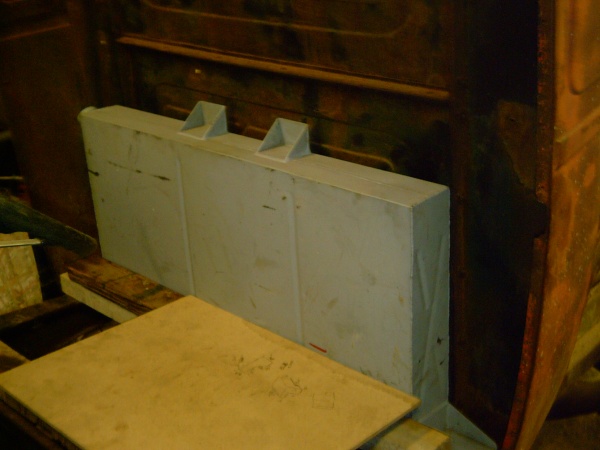
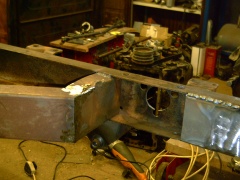
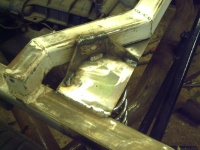
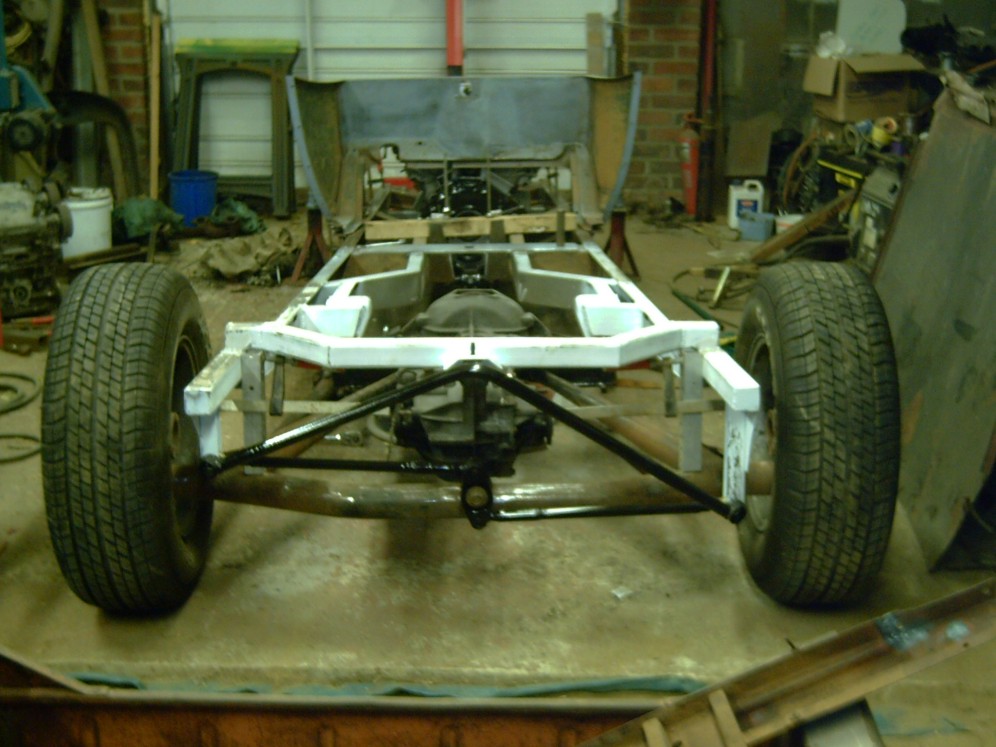
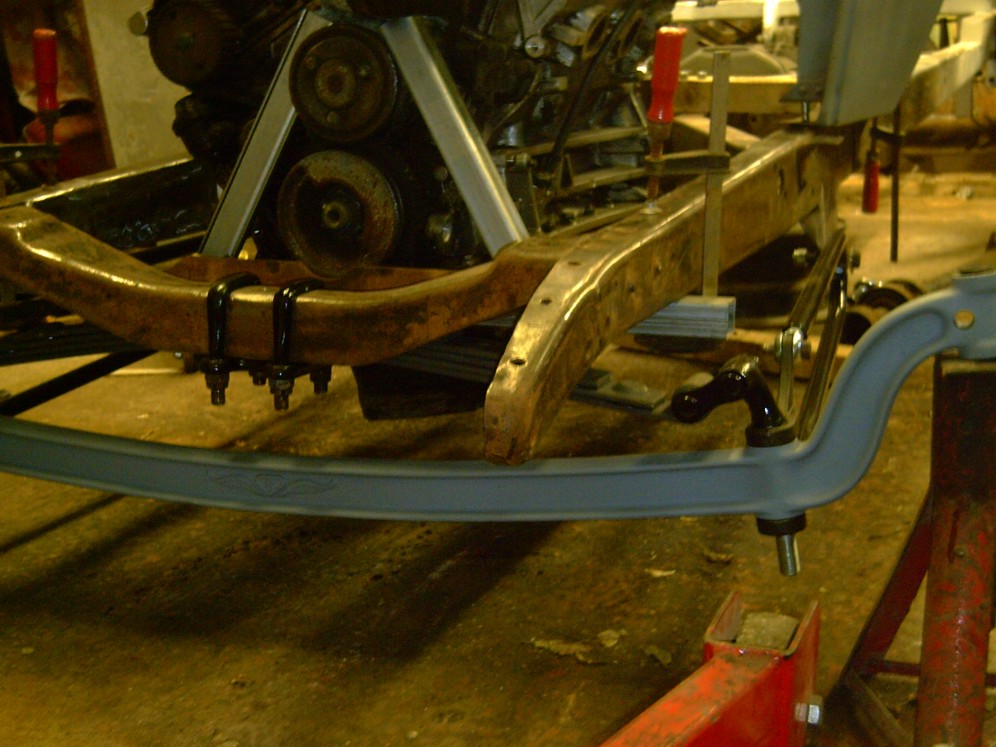
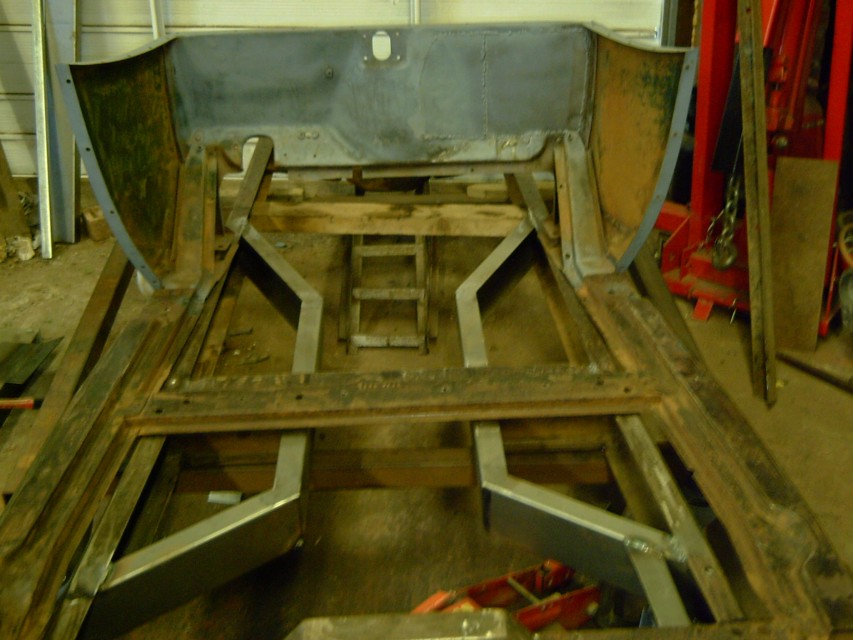
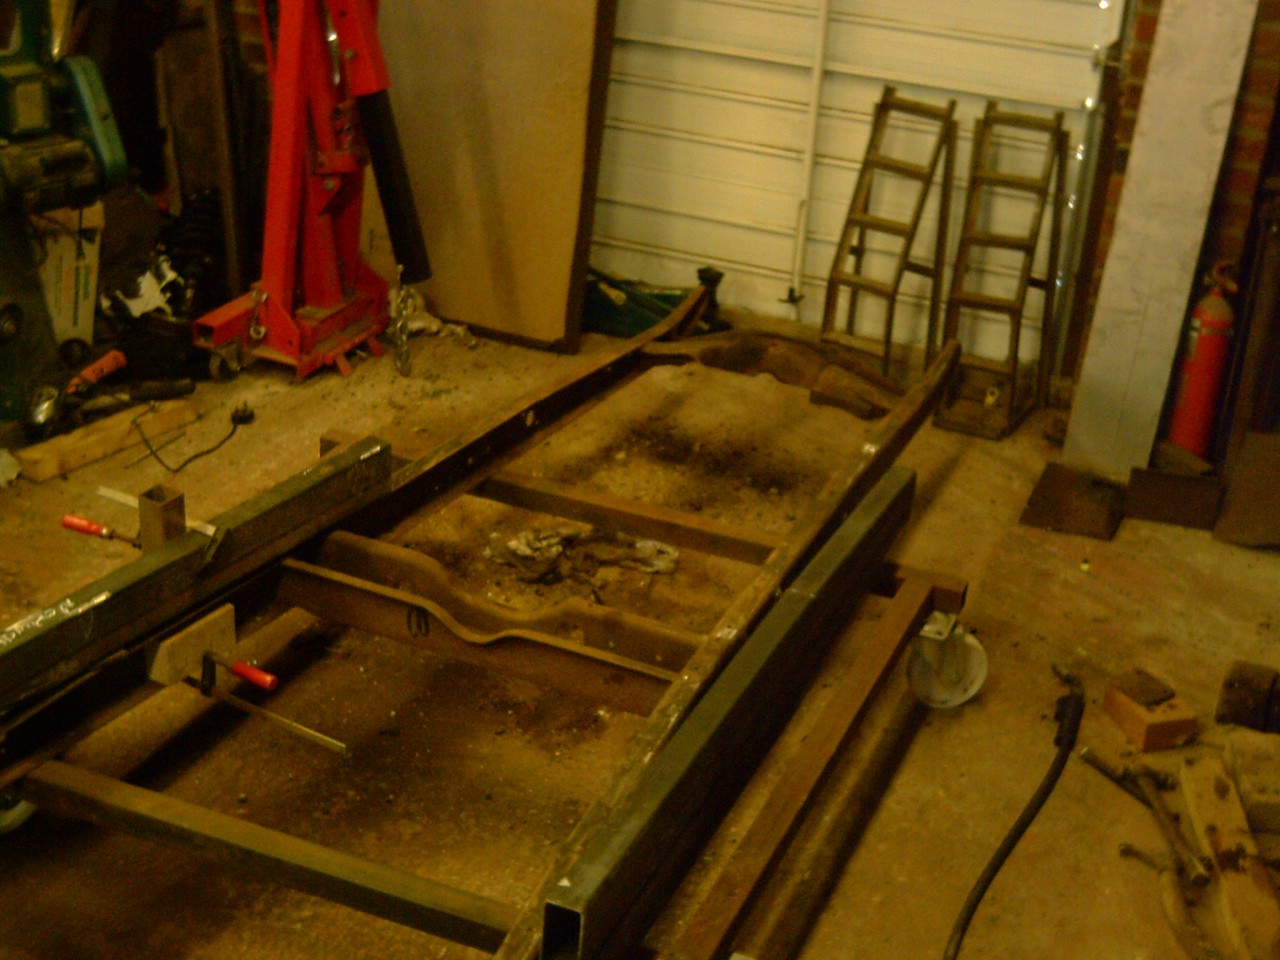
'C' section has been added to the original chassis to improve stiffness and to still allow access to cab mounting bolts, this is actually stronger than boxing the rails. the 'A's rear cross member needed to be replaced with one more suitable for this application. the rear suspension is the Alfa De-dion system. a similar geometry to early Fords.
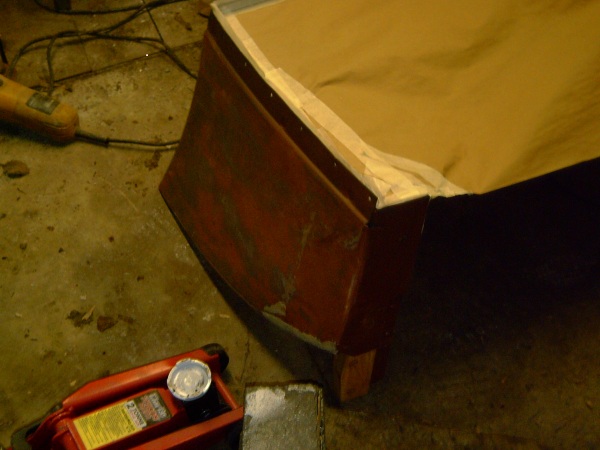
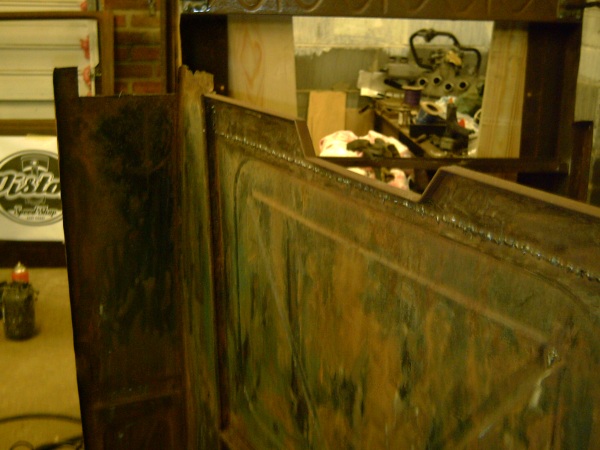
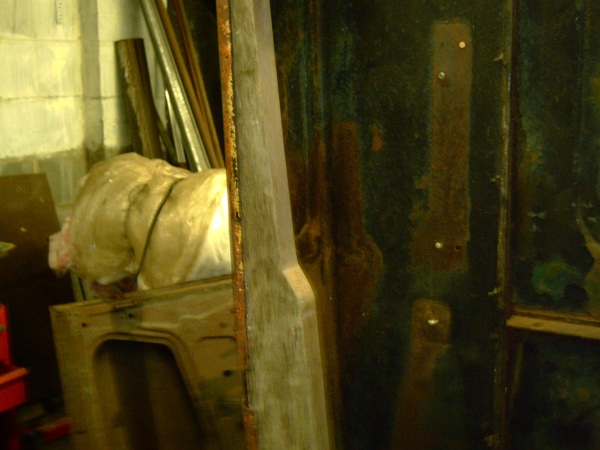
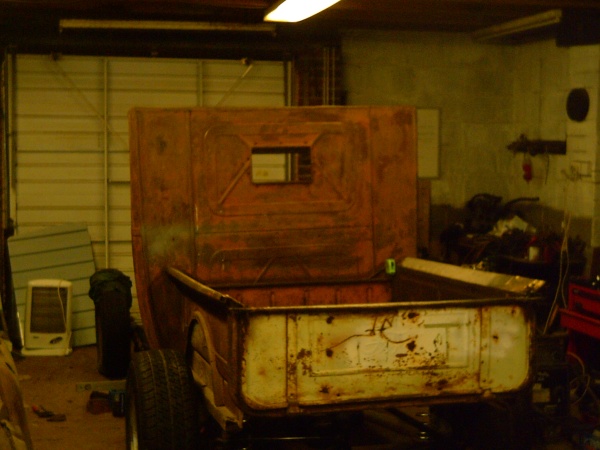
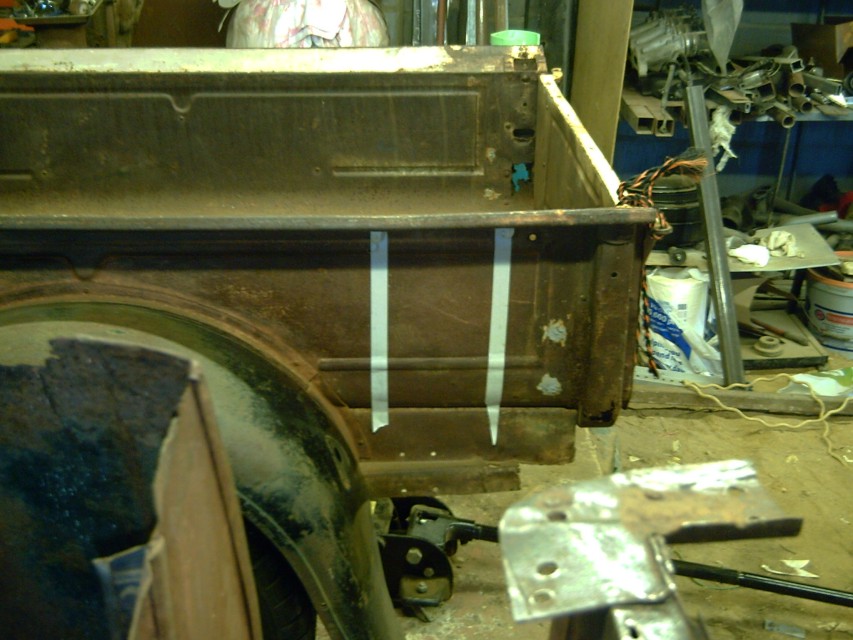
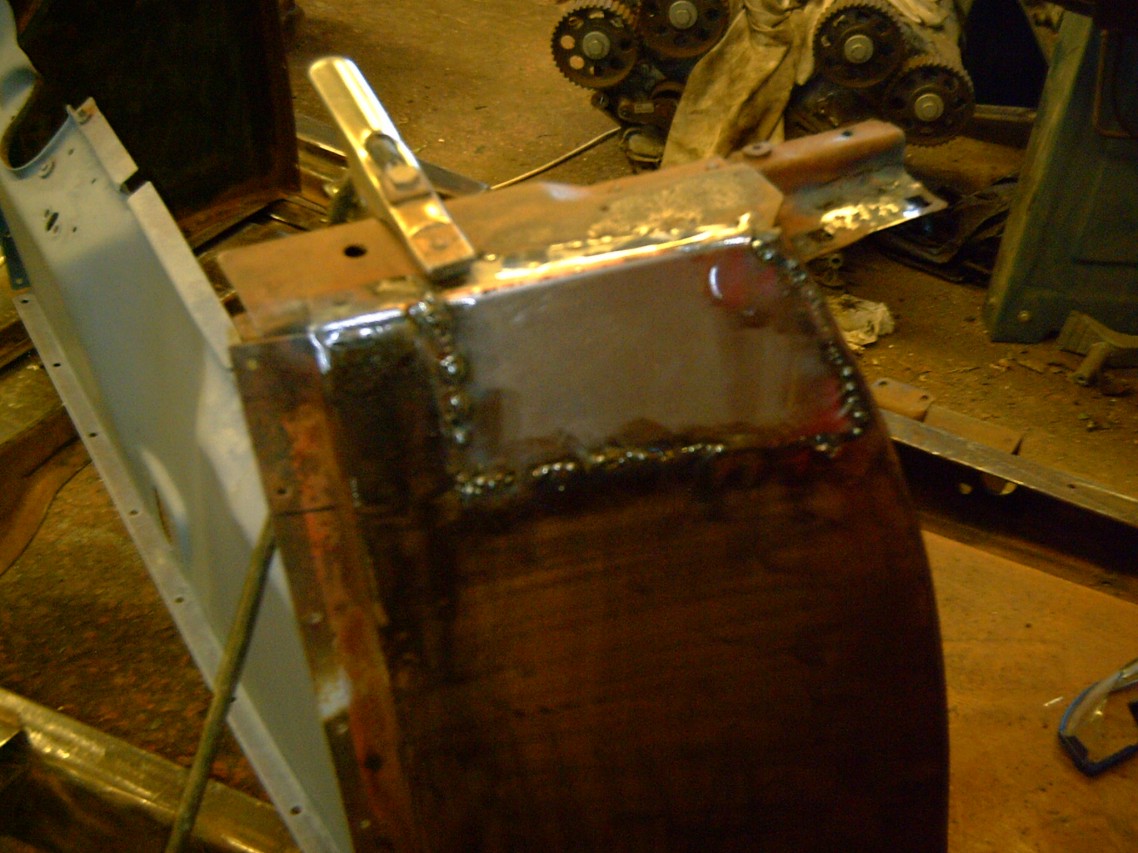
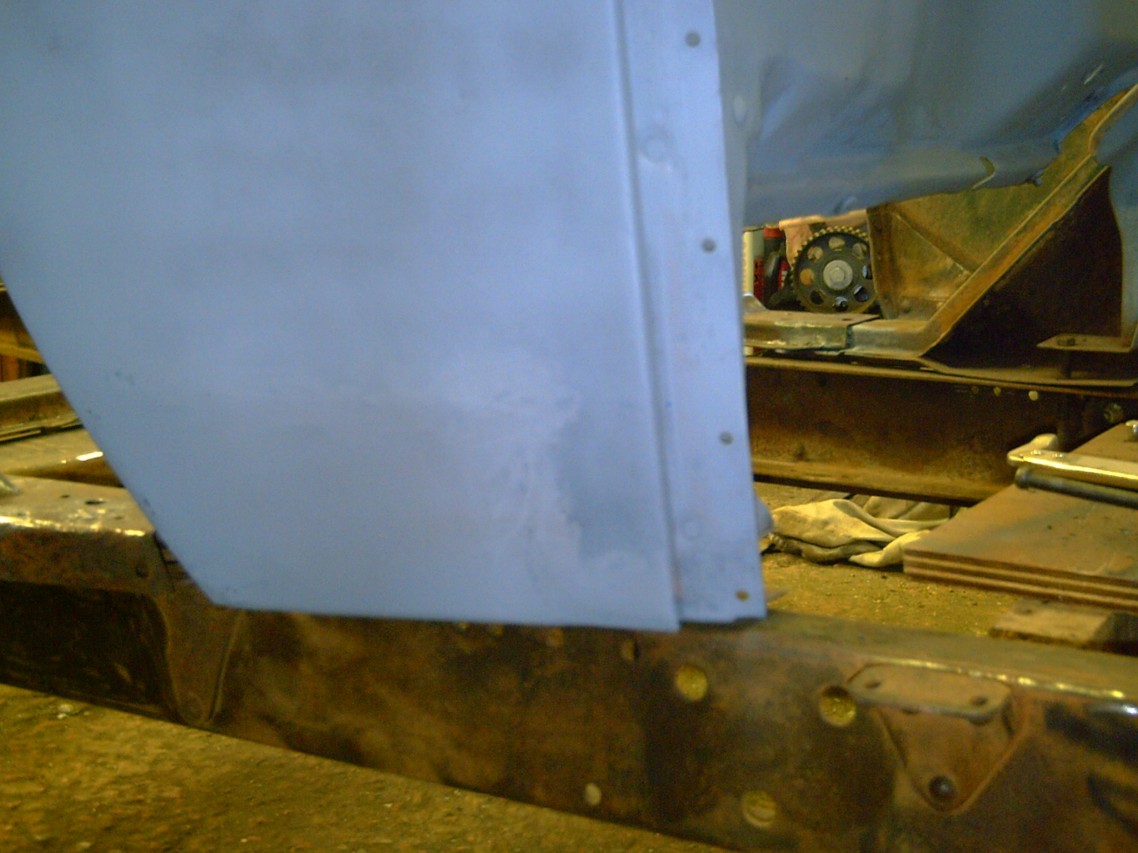
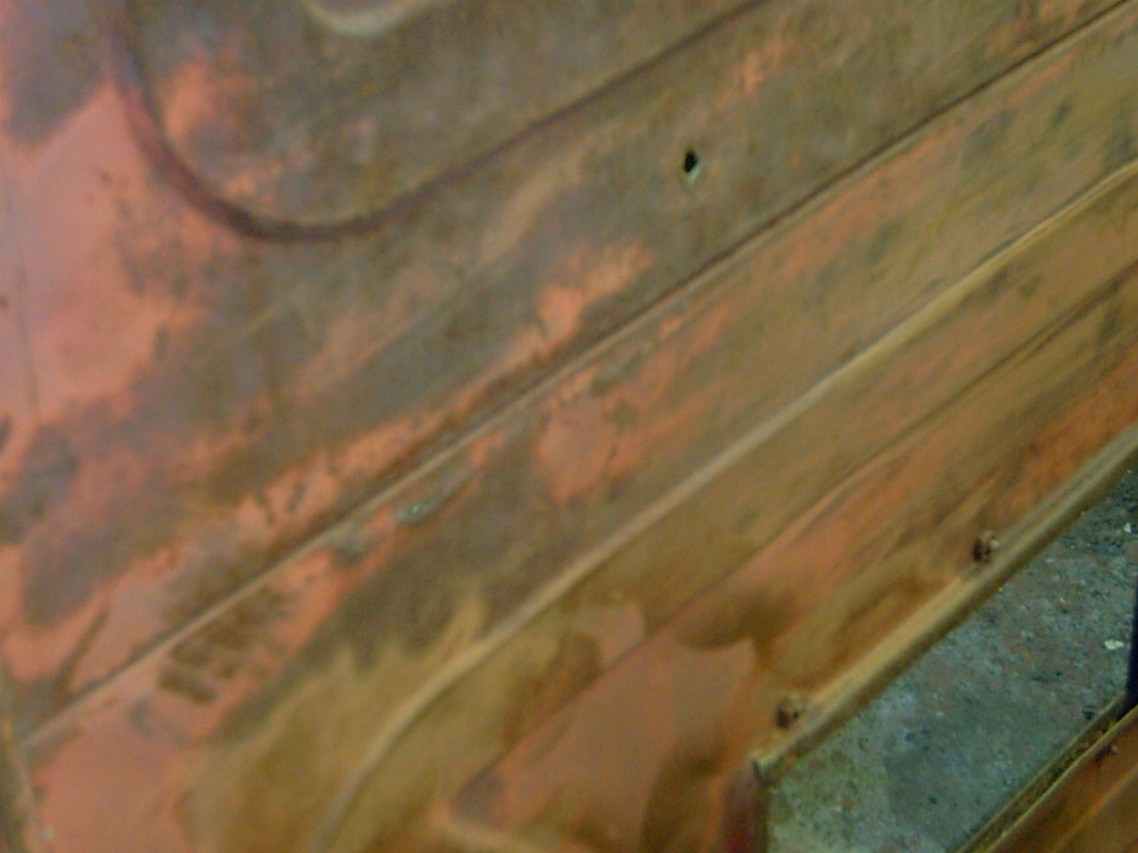
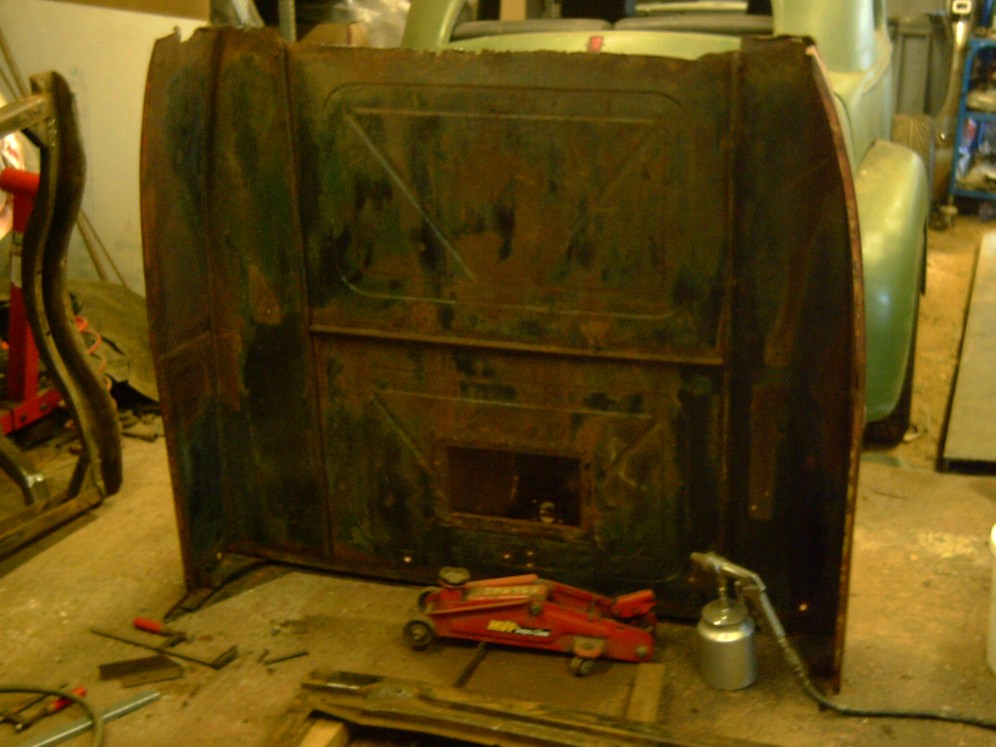
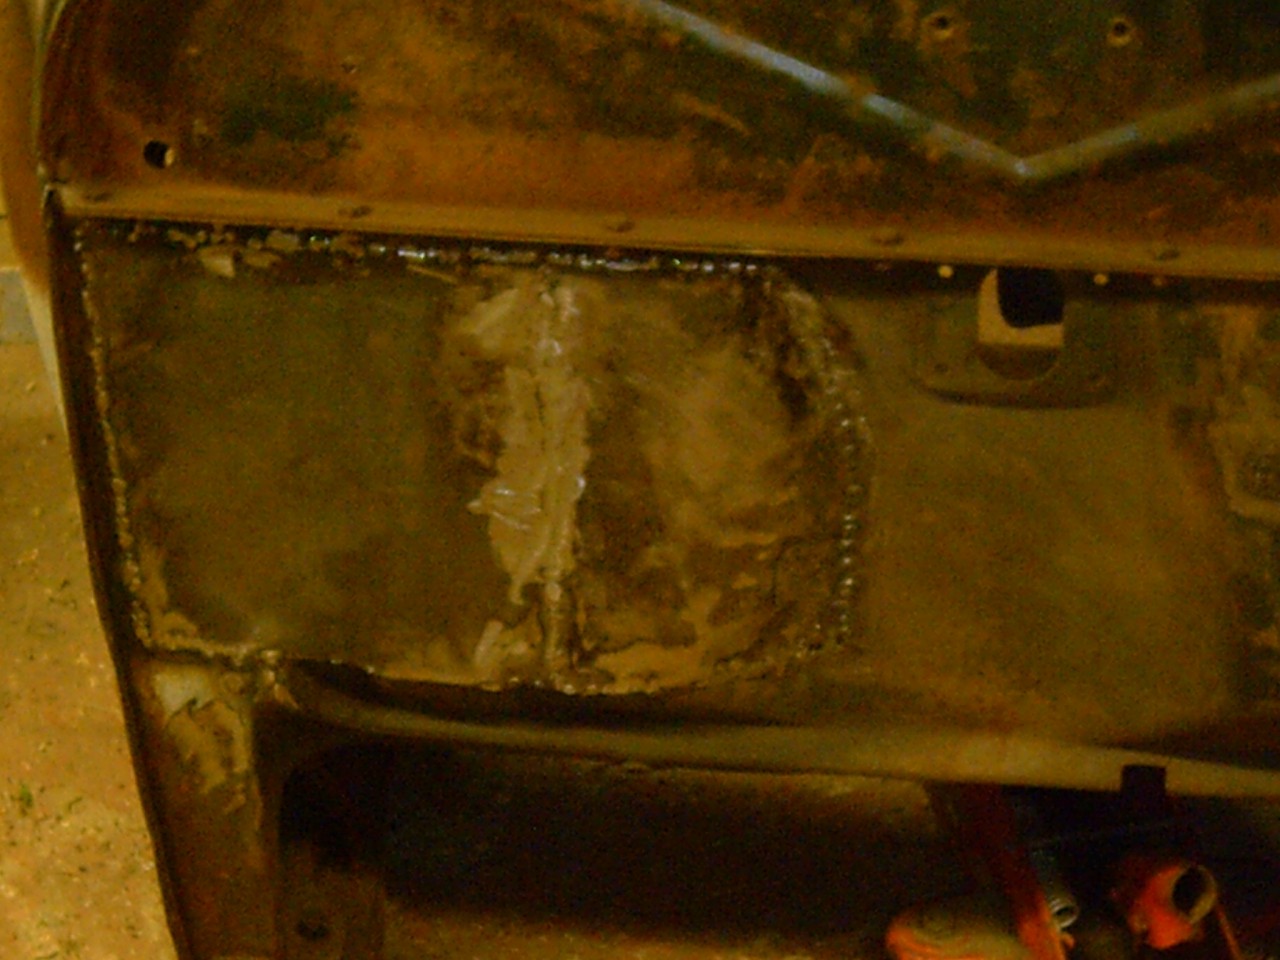
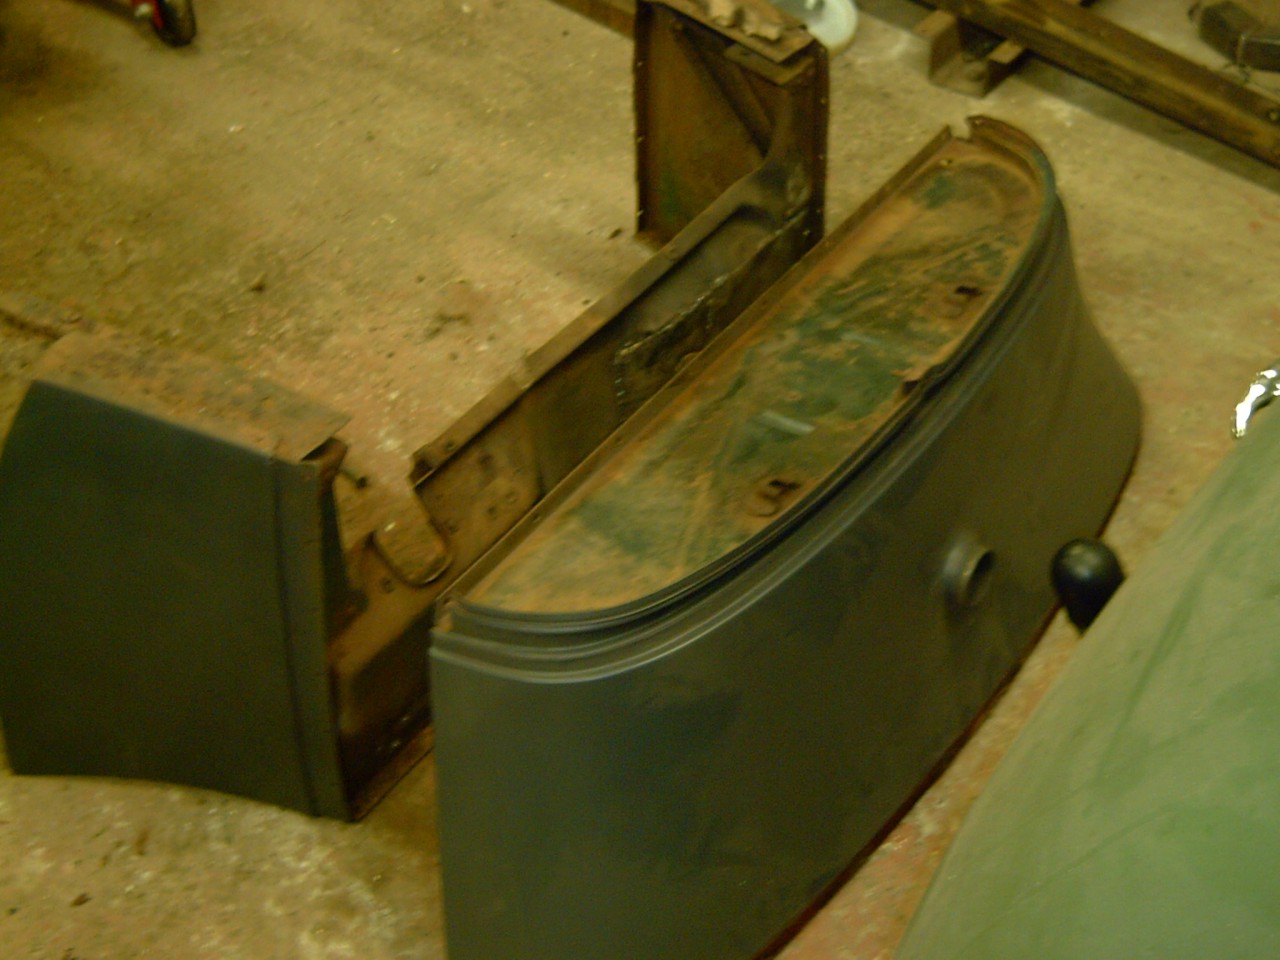
We all knew that the panel work on this truck would take a little time, OS cowl rot has been cut out and a patch made to fit, we have also made the repair panel to fit the rear of the cab. first I have been dollying out the larger dents from the rear of the cab, can't really see to well in the photo but it came up better than expected, little more work & I will be happy. I don't want it to look so good it is mistaken for a glass car. I have still not decided on an engine gearbox as yet, and despite rumors the Alfa in not yet a forgone conclusion, I am still looking at the Ford straight six, a Riley 2.5L twin cam . I like all hot rod styles and the idea of a traditional build appeals, getting away from all the wiring and computers can't be a bad thing? and it allows for a more budget finish.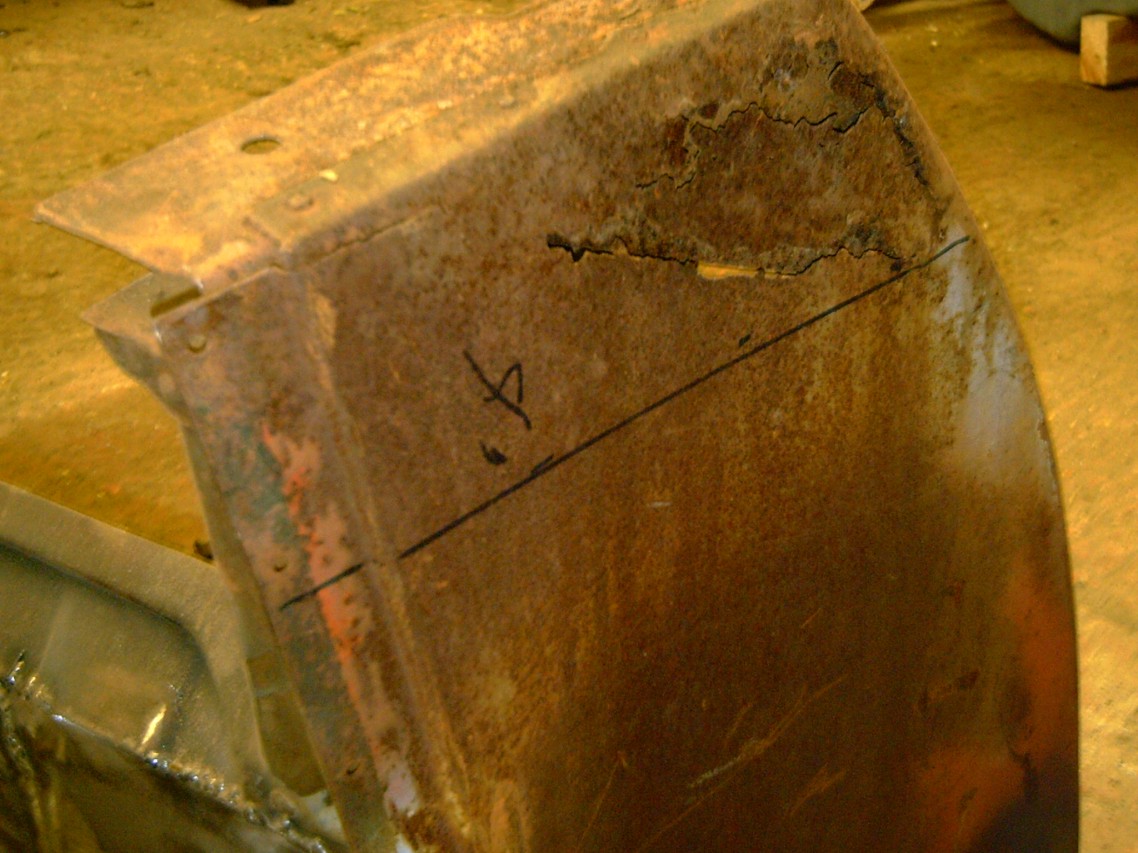 Repair required |
 Patch welded |
 Primed |
 rear panel |
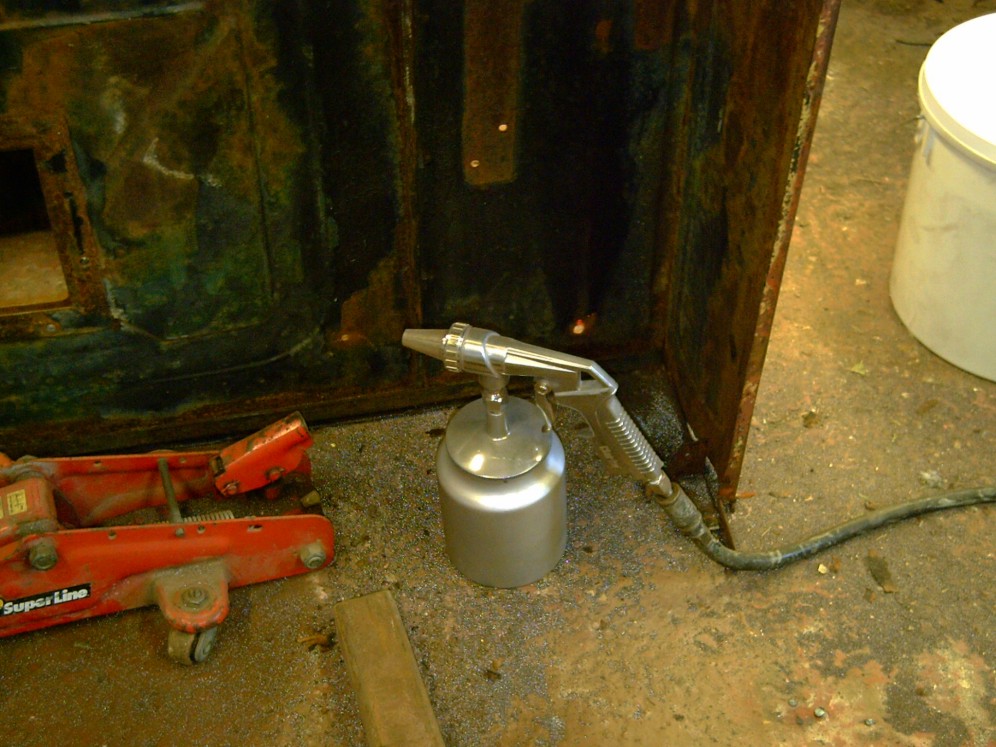
Still more bits, made a change to the cab base by adding a hump, this will help if I lower the cab, & not be seen if I don't. Also bought a blasting gun and media, so time to give the metal a good clean and a coat of anti-rust primer after all these years. I will also give give me a good surface for the welding repairs.
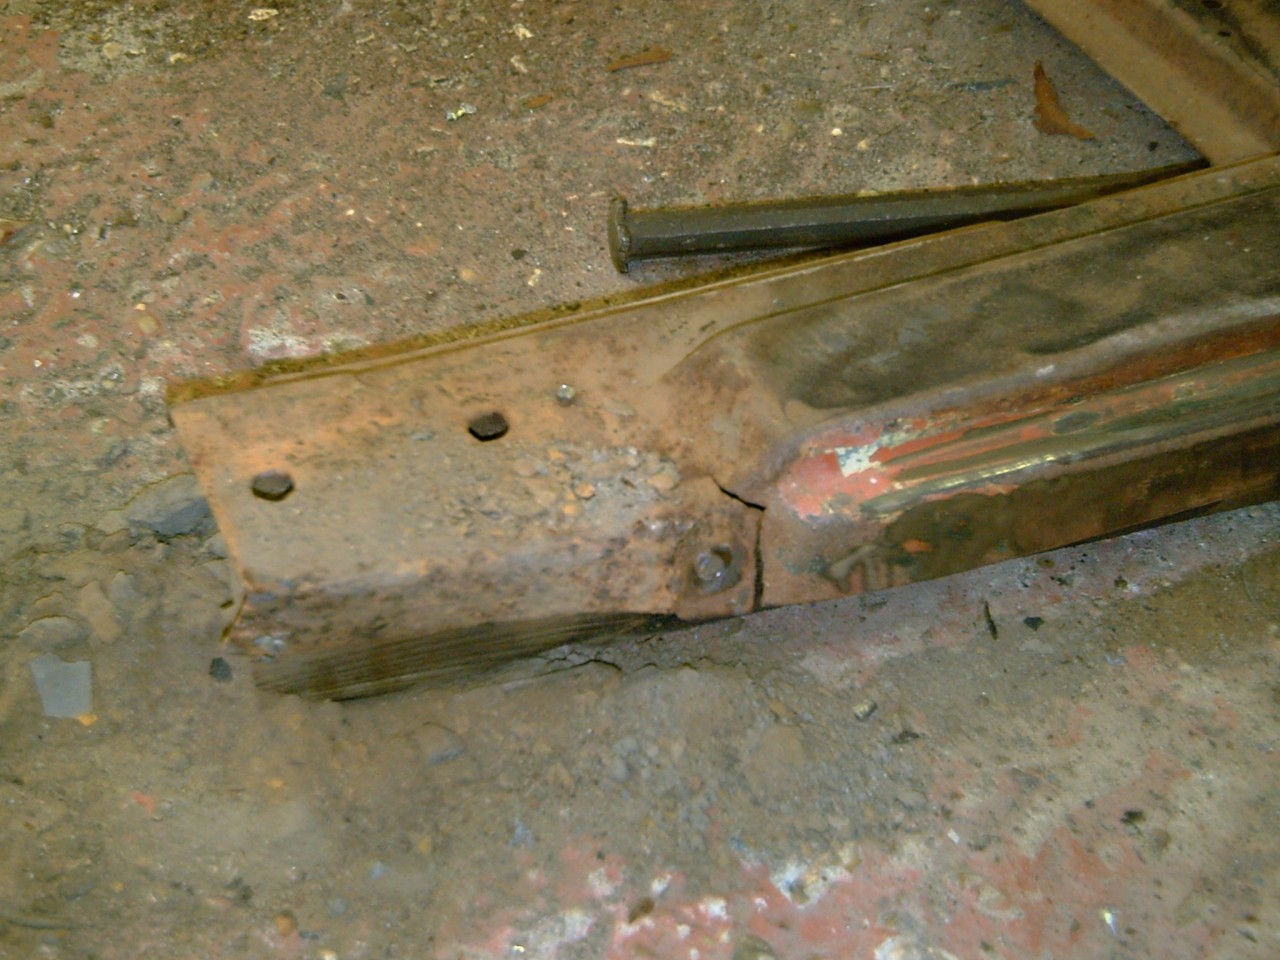
There is damage to the Cab bottom rails that could not be repaired in situ, this is the reason behind the dismantled cab, It will also allow repairs in other areas to become easier.
There is still no final decision on the engine or the drive line. I will be at least 2.5L and not Diesel. I had been toying with the idea of a Traditional build using an old Ford 3.3L straight six with a 3 speed manual. As I have so many steel panels, fenders, buck and the likes I think the plan is possible my take on Pete & Jake's gold A truck

Bottom cab rail |
Cab back |
Sand Blast |
Step in cab rear |
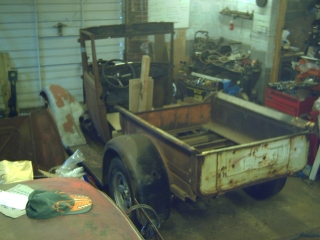
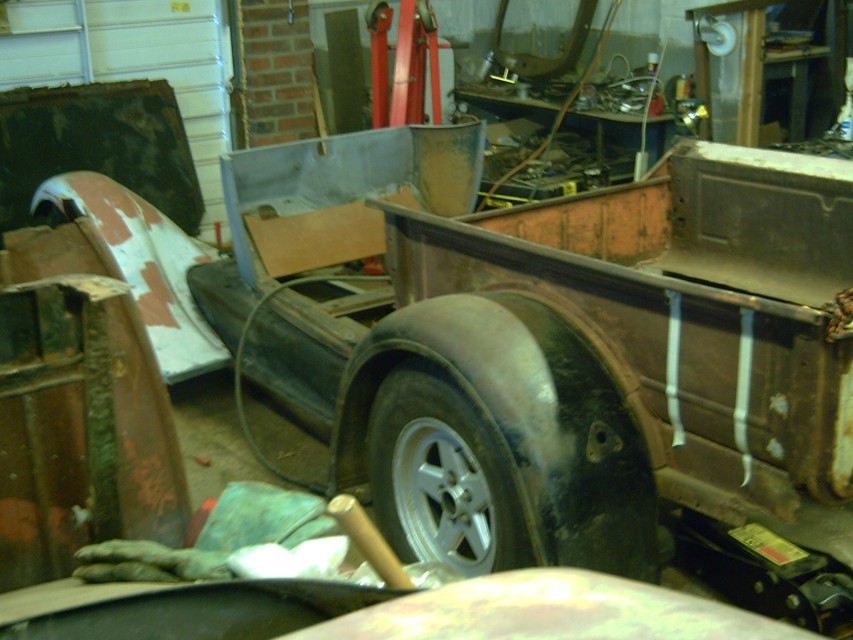
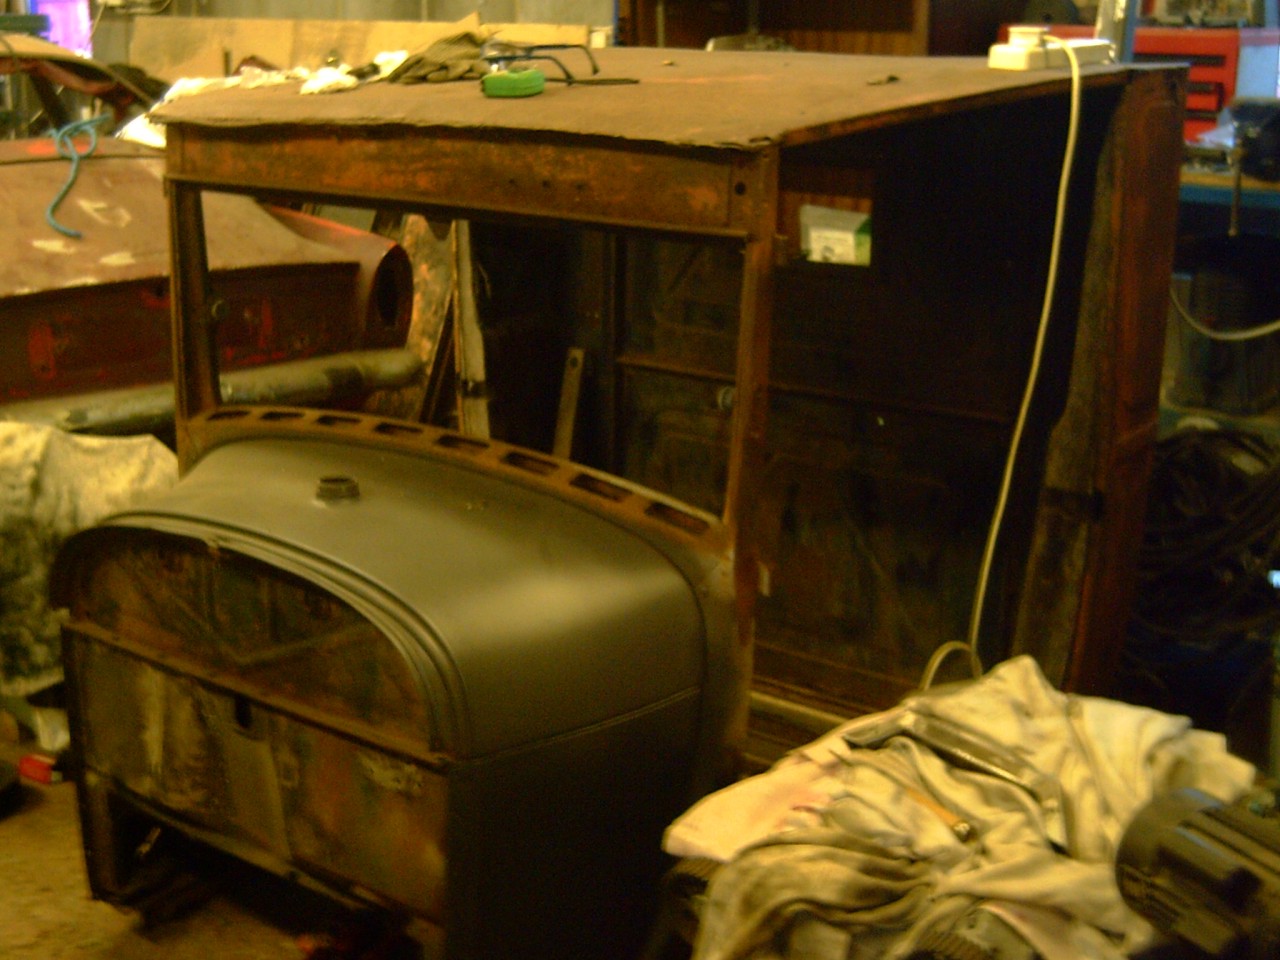
After buying the 'A' at the show in Aug it was Oct before I could pick it up. Once in the garage it did not take long to remove the axles , the buck and wings. As I had not purchased the engine and wheels the engine had already been removed before collection and the wheels I need to return to Brian when we next meet.
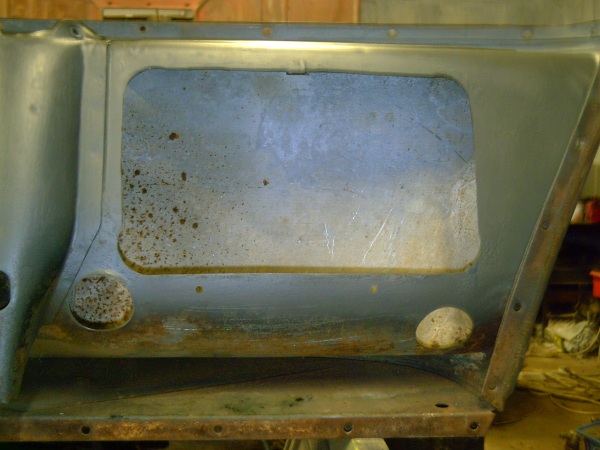
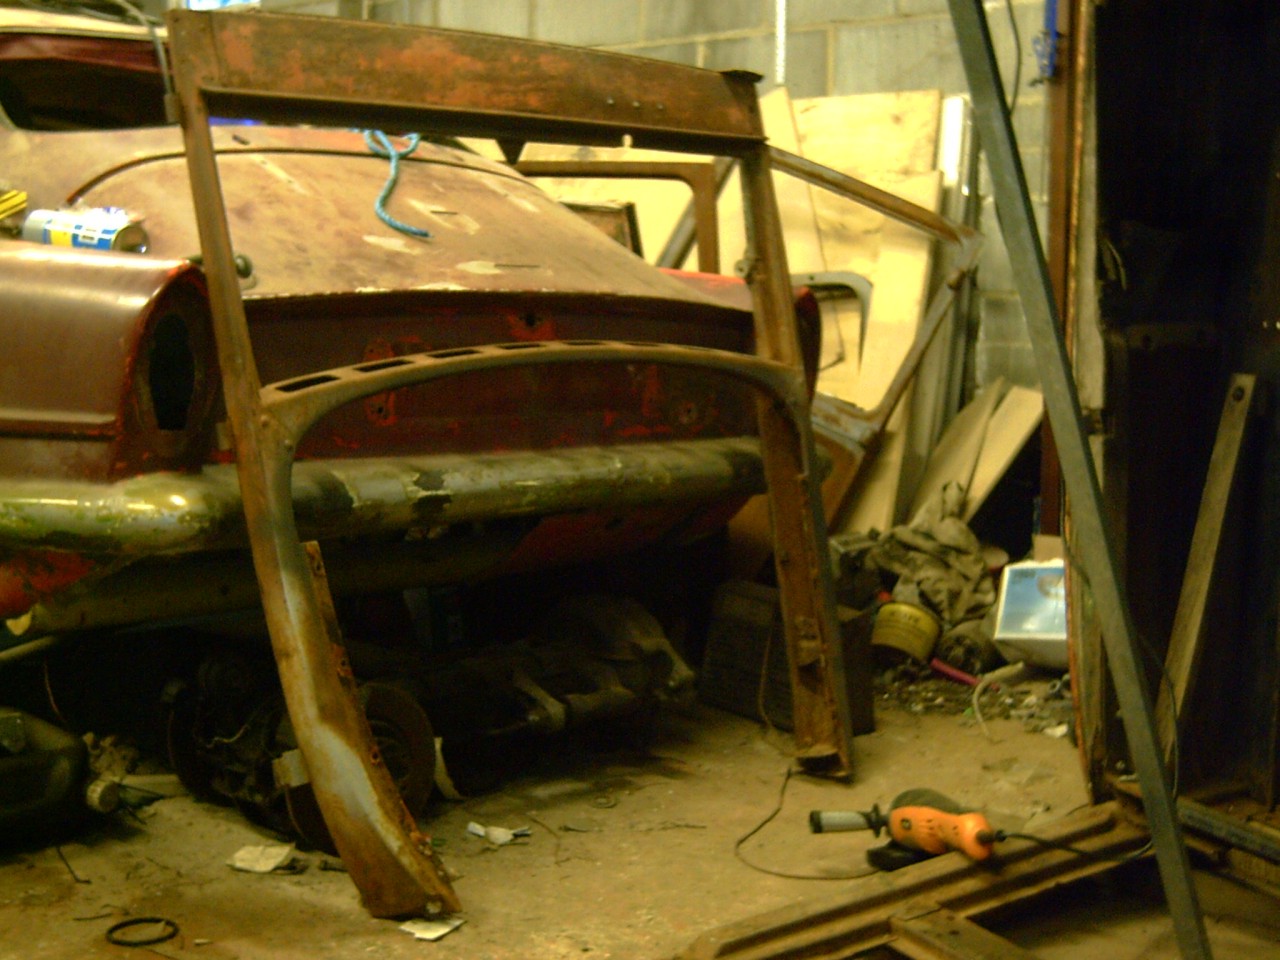
As all rodders would, the first thing we did was to mock up a few different ideas, wheel choice in the photos is only because the tyre sizes were about right. All model 'A's have limited engine may space so the first mod was to set the right side bulkhead back,
It's at times like these you realize that this shell is almost 80 years old and that a little more than a quick rub down and a coat of paint will be required.
At the Show, 2007 NATS. |

Mock up front height, Low option. |

Bye, Bye Cab Floor |
Bulkhead Mod, |
 Cab off Chassis |
Original Chassis Rails, being cleaned |

Cowl & Tank removed |
Cowl & Tank |
Cab Front Removed |
Cab rail damage. |